An AI Avatar is your digital version that talks and thinks like you. It’s available 24/7, so learners and customers can interact with you even when you’re not around. Trained on your content, it makes sure your voice and style stay consistent.
Why should you create an AI Avatar?
- Your avatar takes care of routine questions, so you can focus on creating content or running your business.
- It gives every learner a personalized experience, guiding them toward the right answers, courses, or offers making sure they get value for money.
How to create an AI Avatar?
This guide will walk you through each step of creating your own AI avatar based on the objective you want to achieve with it.
Step 1: Select Products from left navbar and click on AI Avatar. 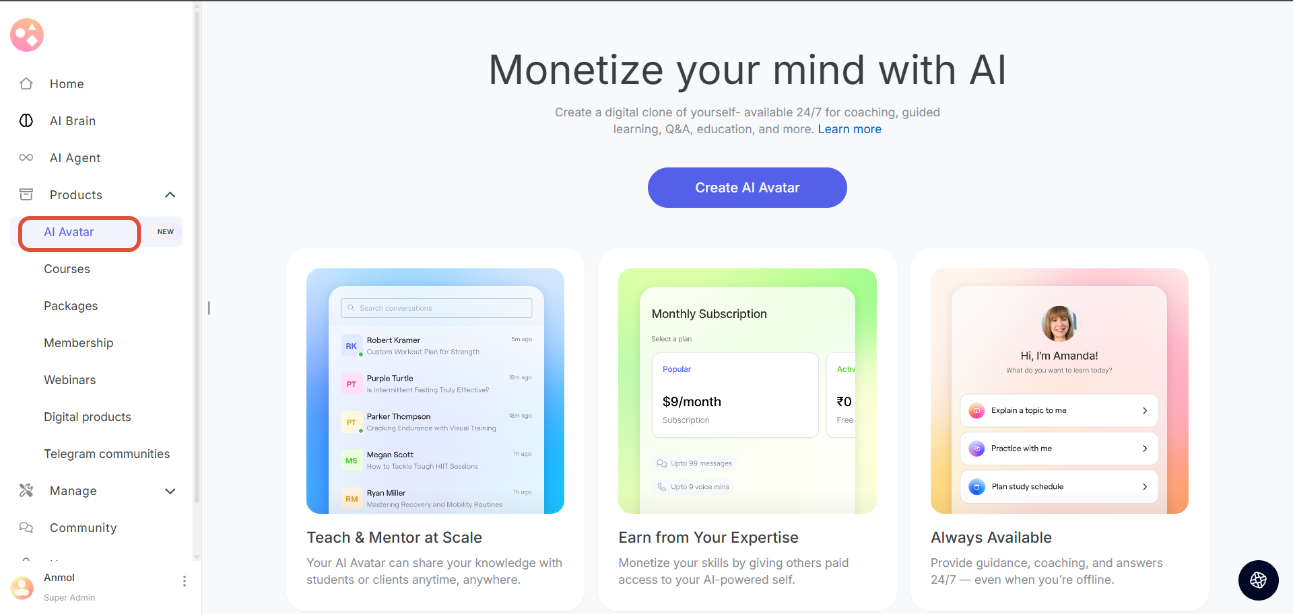
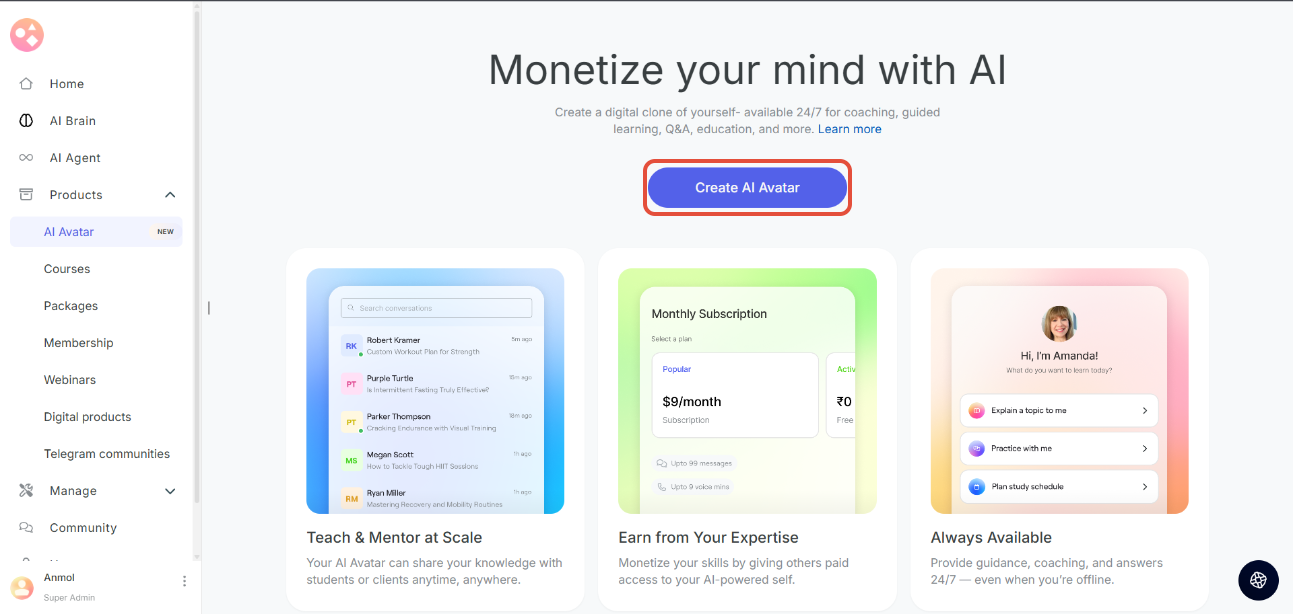
Step 2: Click Create AI Avatar to start creating the Avatar.
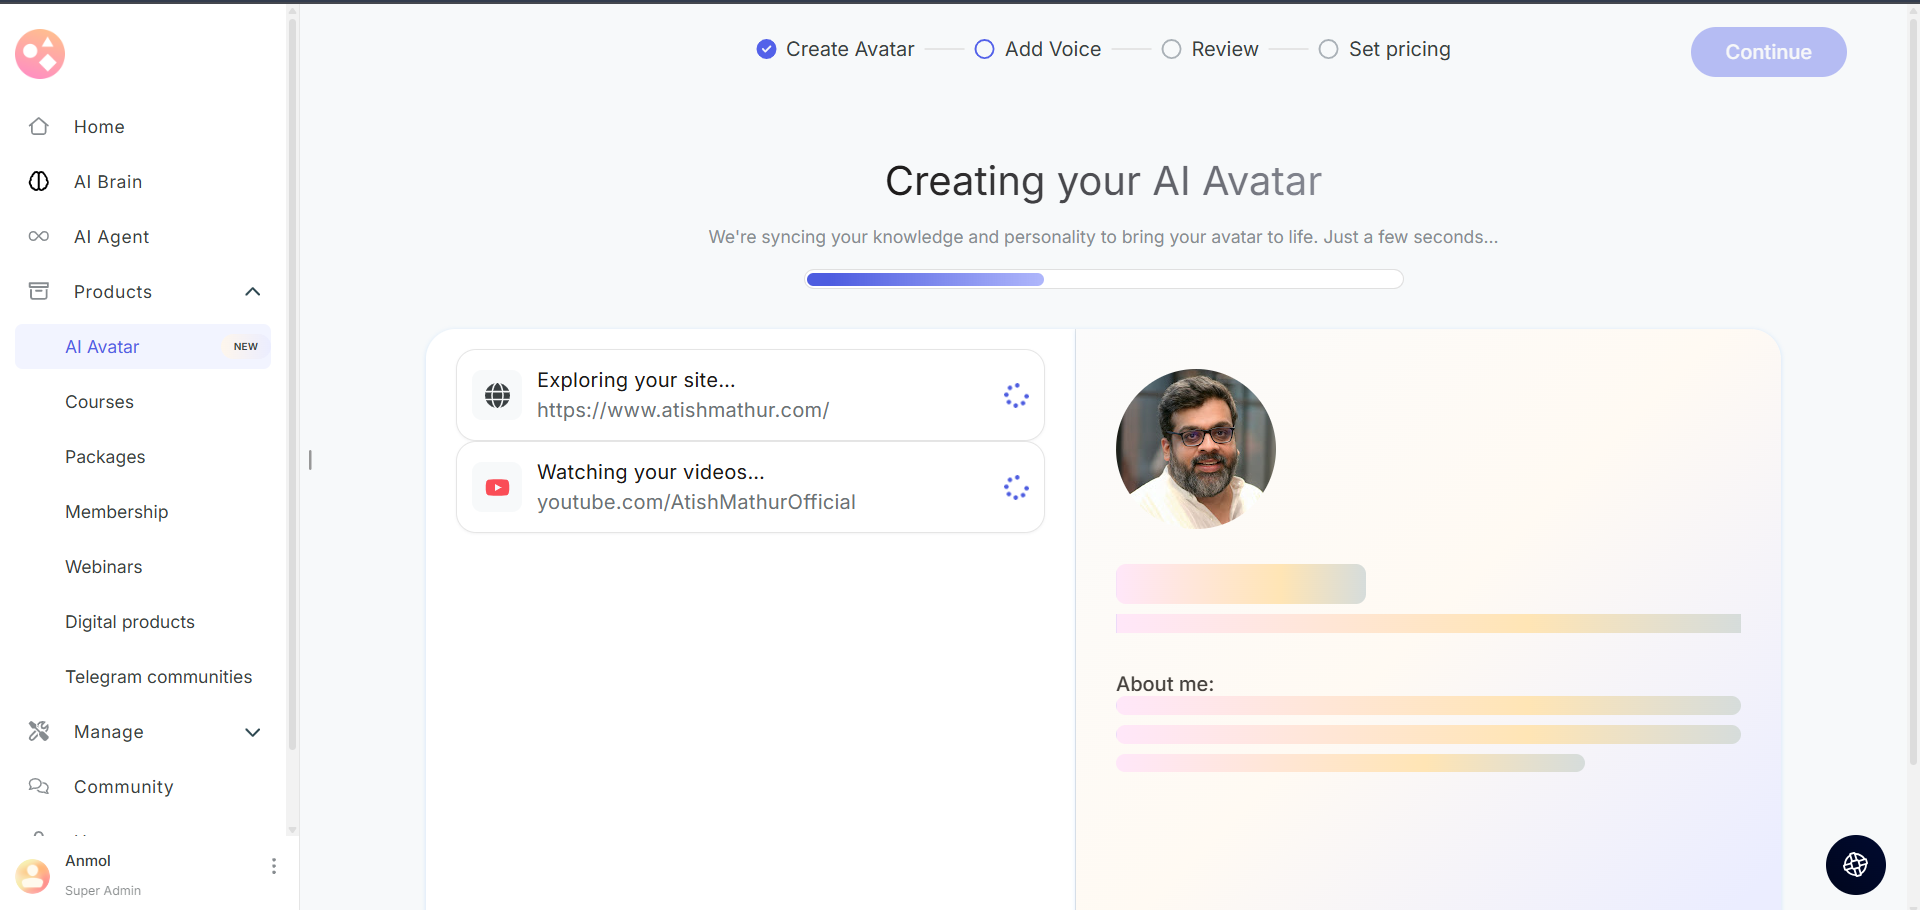
Step 3: Add your content to train your Avatar's brain. Your AI needs to learn from your content to sound like you.
- Add Your Social Media Accounts
- Link platforms where you regularly share your expertise. Your public posts help your AI learn how you communicate.
- Note: We will only fetch the data that is publicly available. Private profiles and DMs will not be accessed.
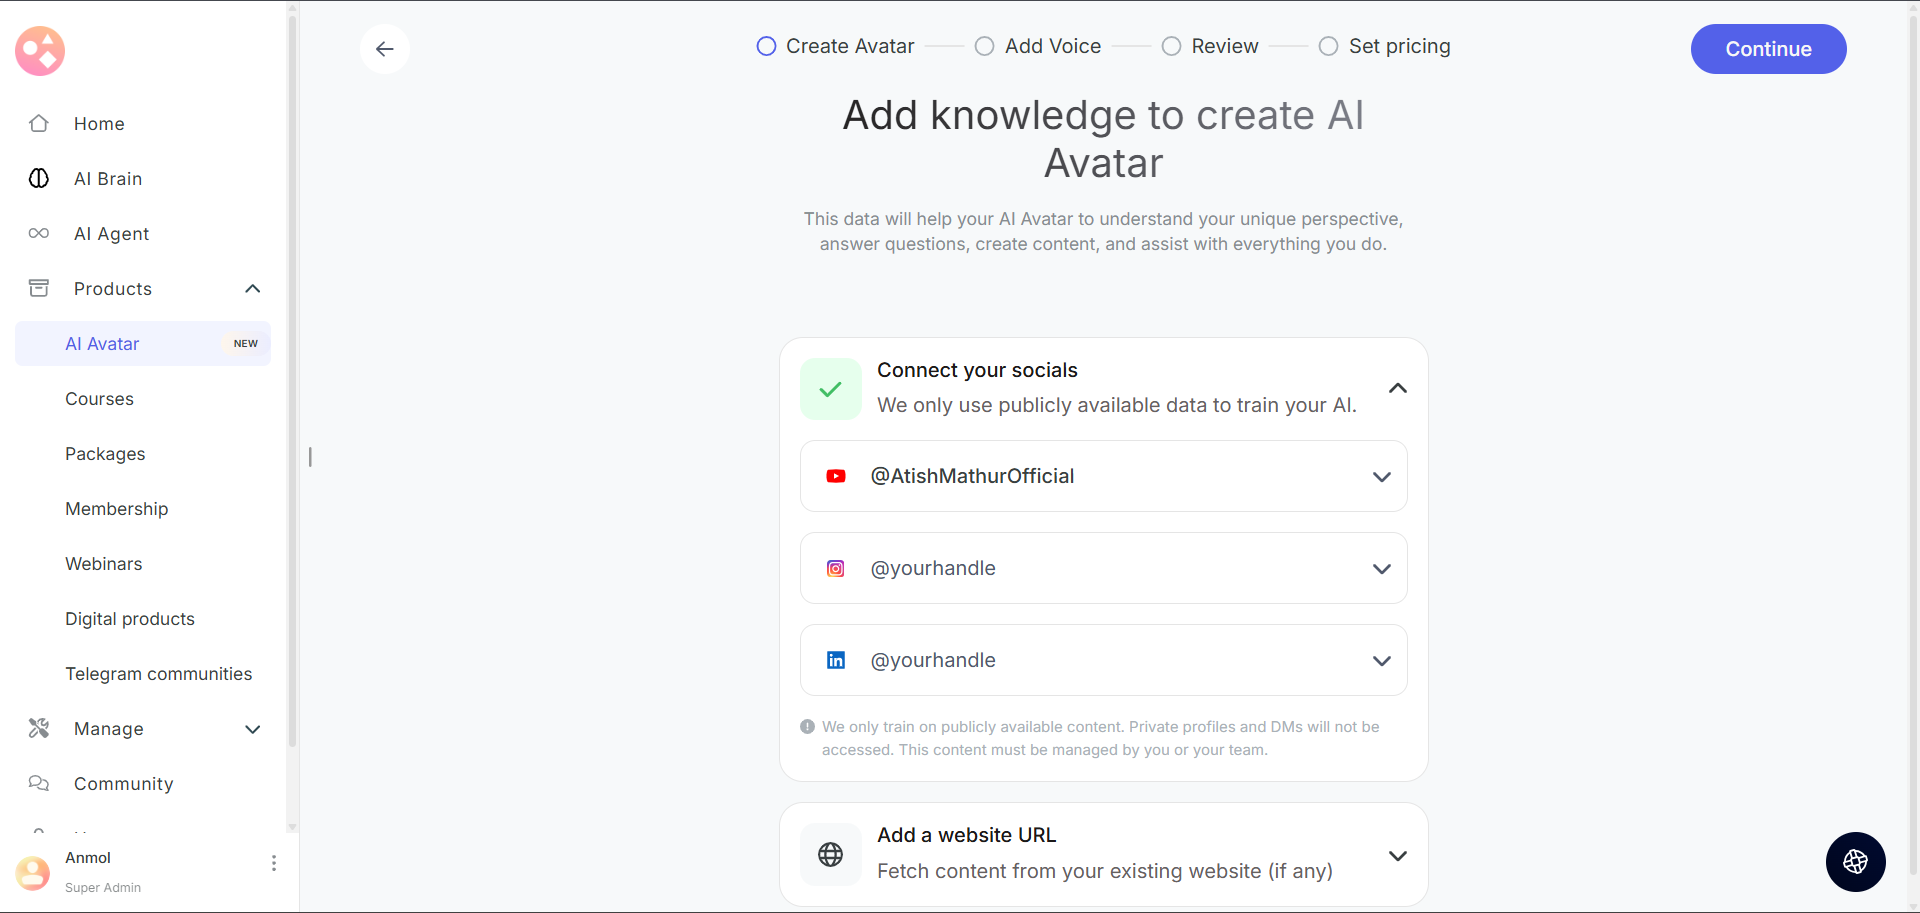
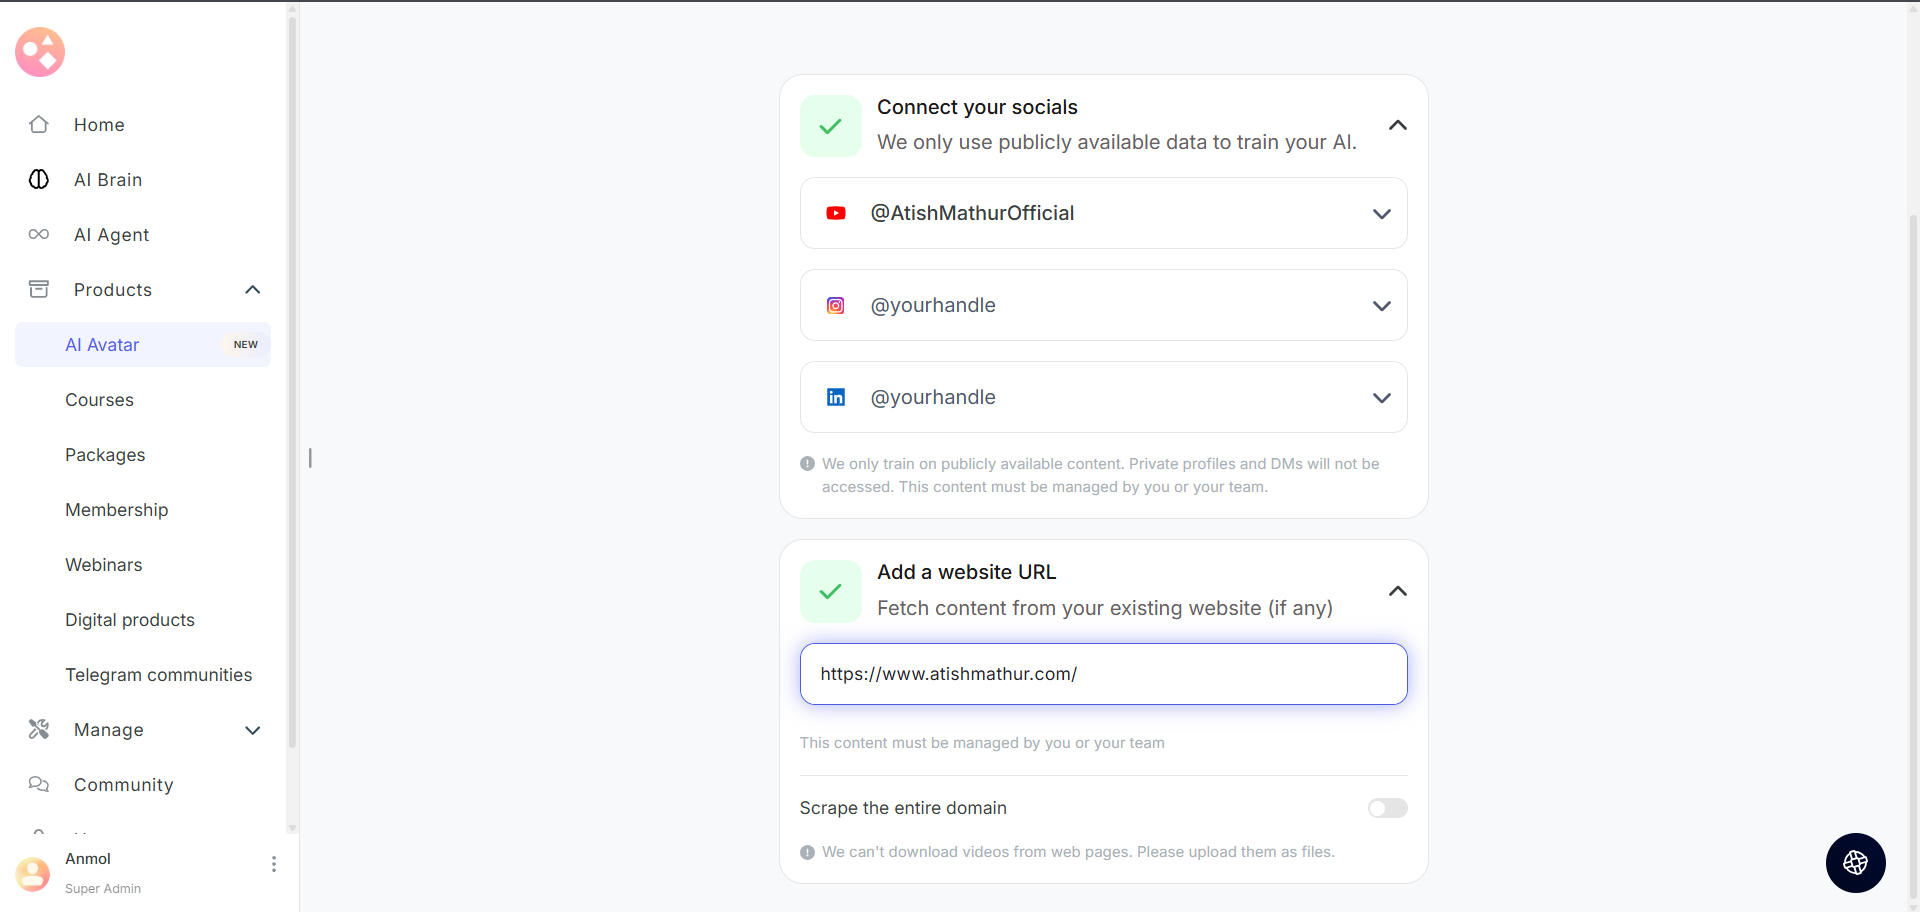
2. Add Website URL
- Add website links that contain valuable information about you and your areas of knowledge.
- You can add link to website, blogs or portfolio. For e.g.- www.yourwebsite.com
- Choose if you want to scrape all the pages of the website link added.
- Note: We can't download videos from the websites, please upload them directly as files.
Step 3: Click "Continue" to proceed to voice customization

The avatar will look at the social handles and website you have added, pull out important details like your bio, work, skills, tone & style, and then automatically genarate a profile for you. You’ll be able to review and edit it before saving.
Step 5: Voice Configuration (Optional)
Adding a voice makes your avatar feel more human and engaging. Learners will not only read but also hear responses just like talking to you.
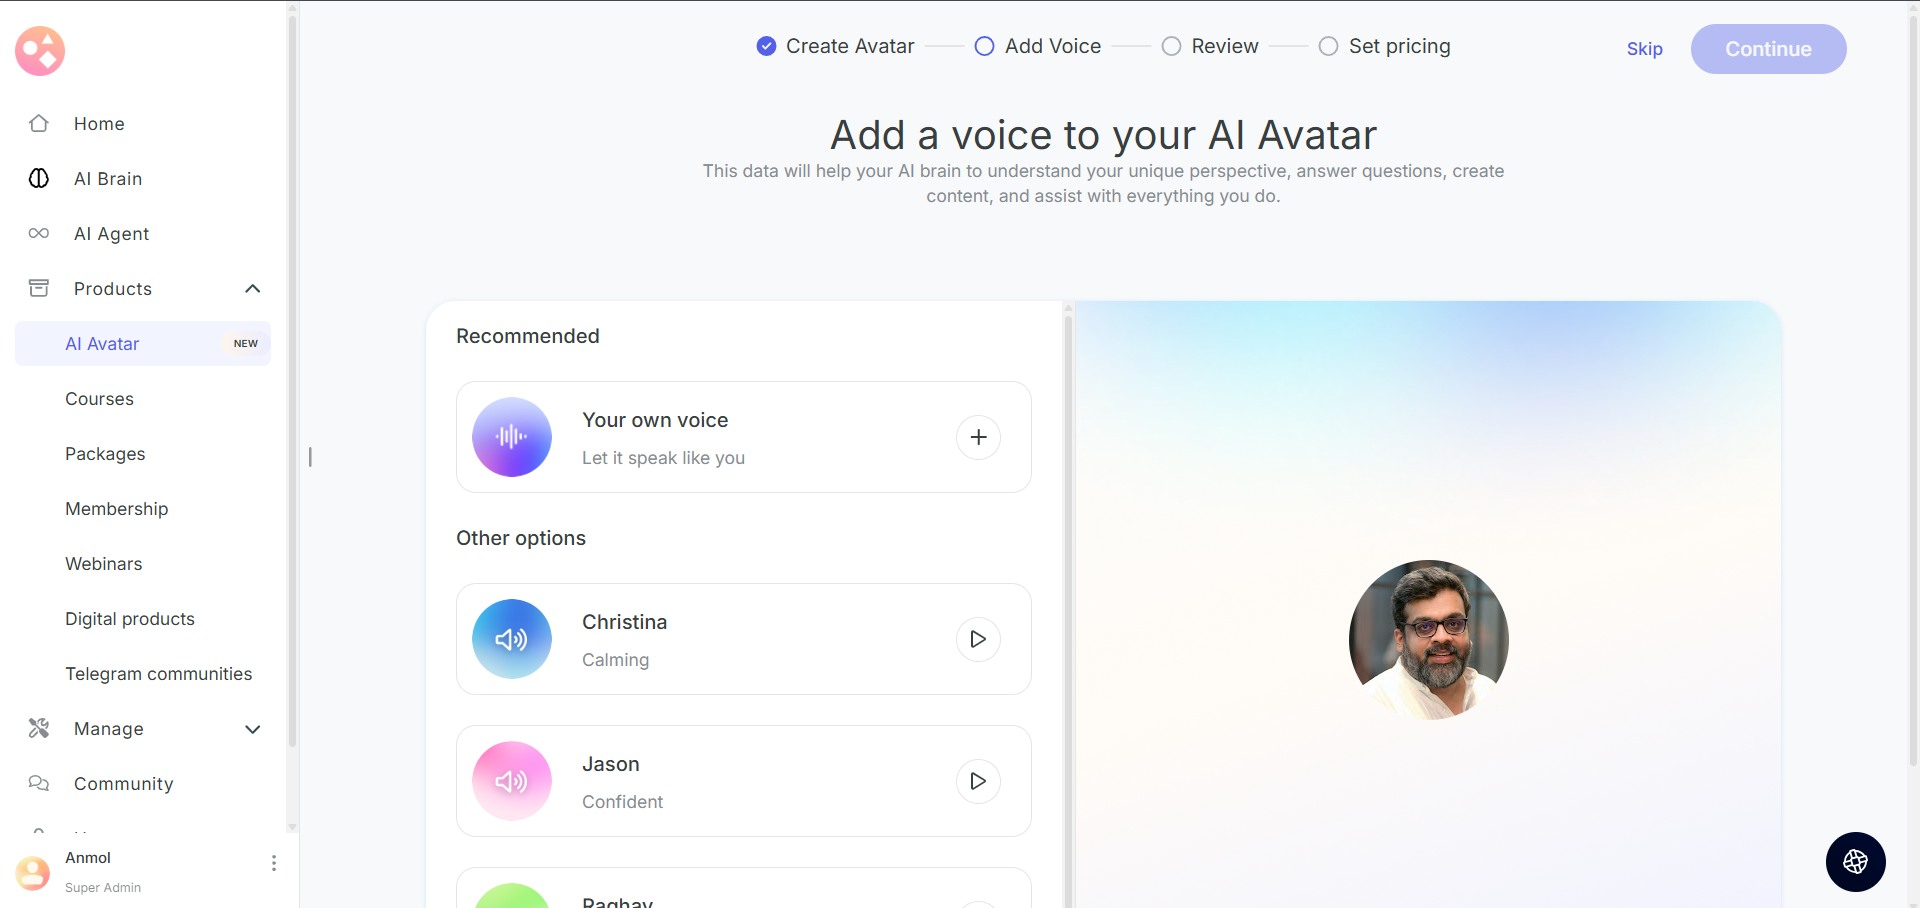
Option 1: Use Your Own Voice - This keeps your avatar as close to your real presence as possible.
- Click the "+" button to add a custom voice
- Choose your upload method:
- Upload Voice Sample: Select an audio file from your computer
- Record Now: Use your microphone to record directly in the browser

Option 2: Use default voice options available . You can listen to the voice and select whichever voice suits your brand.
Option 3: Click "Skip" if you want to add voice later. If you’re not ready now, your avatar will still work through text.
To learn more about adding voice, check out this help article.
Step 6: Please carefully review all the information you have provided. Click continue to proceed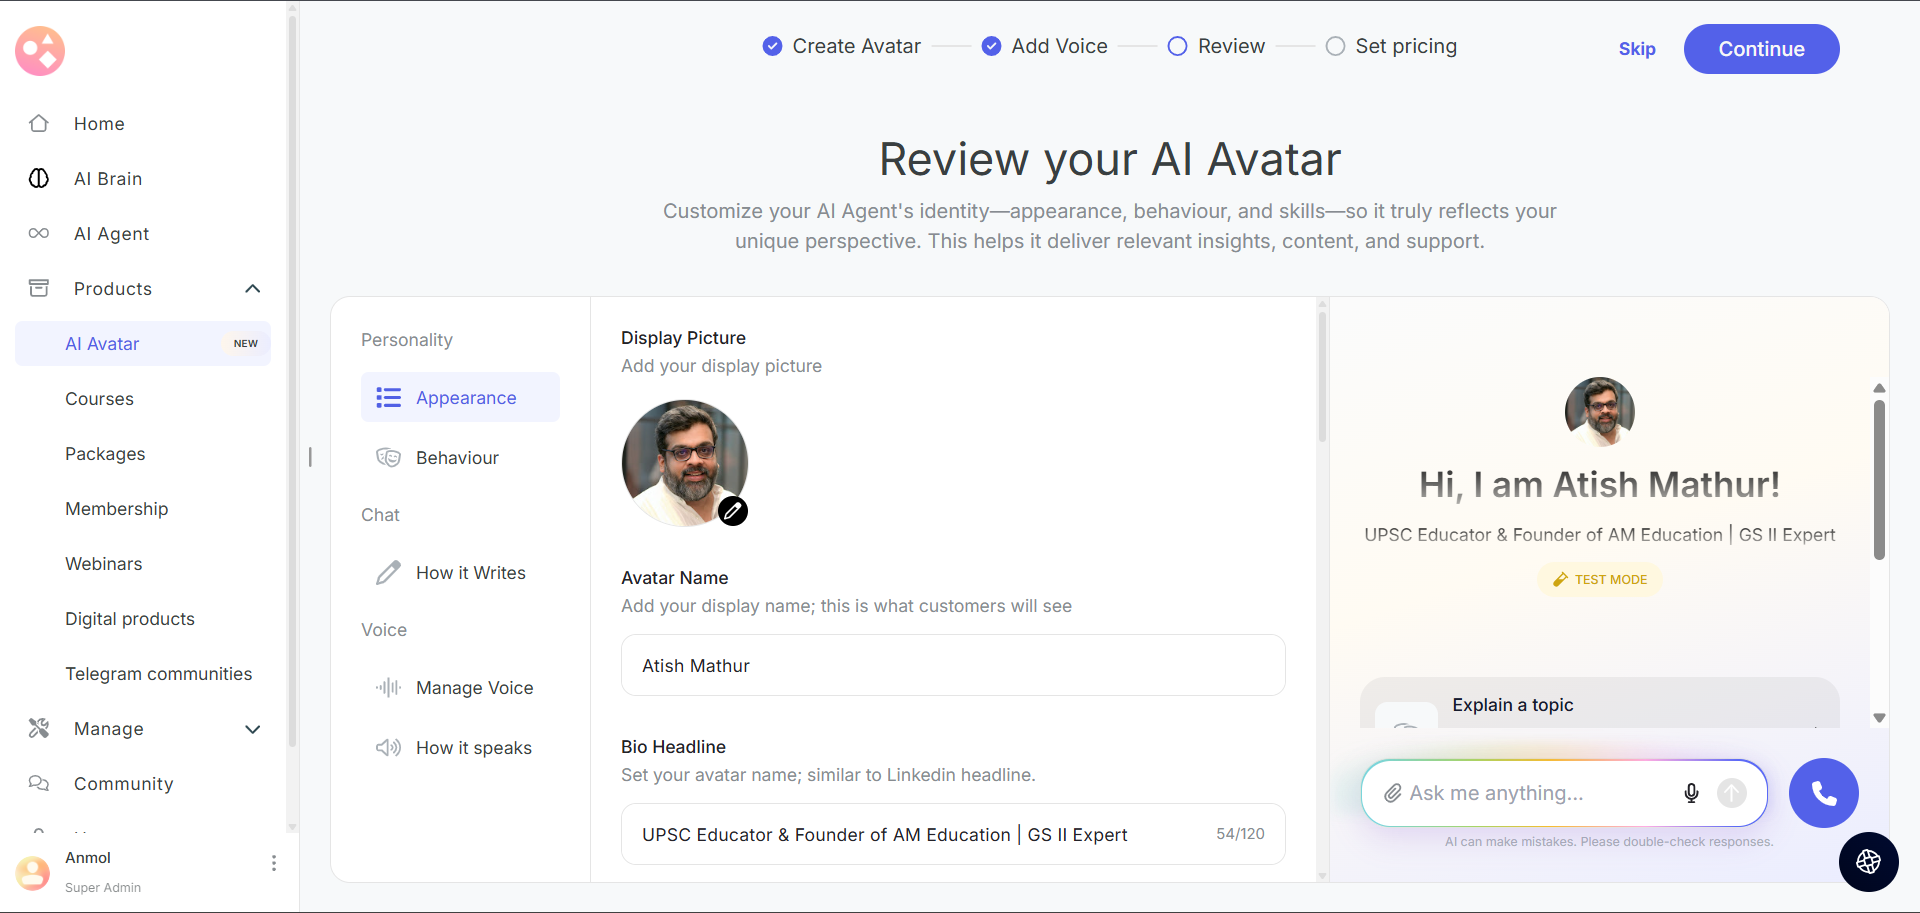
Step 7: Choose Your Pricing Plan
Select the pricing structure for your AI Avatar:
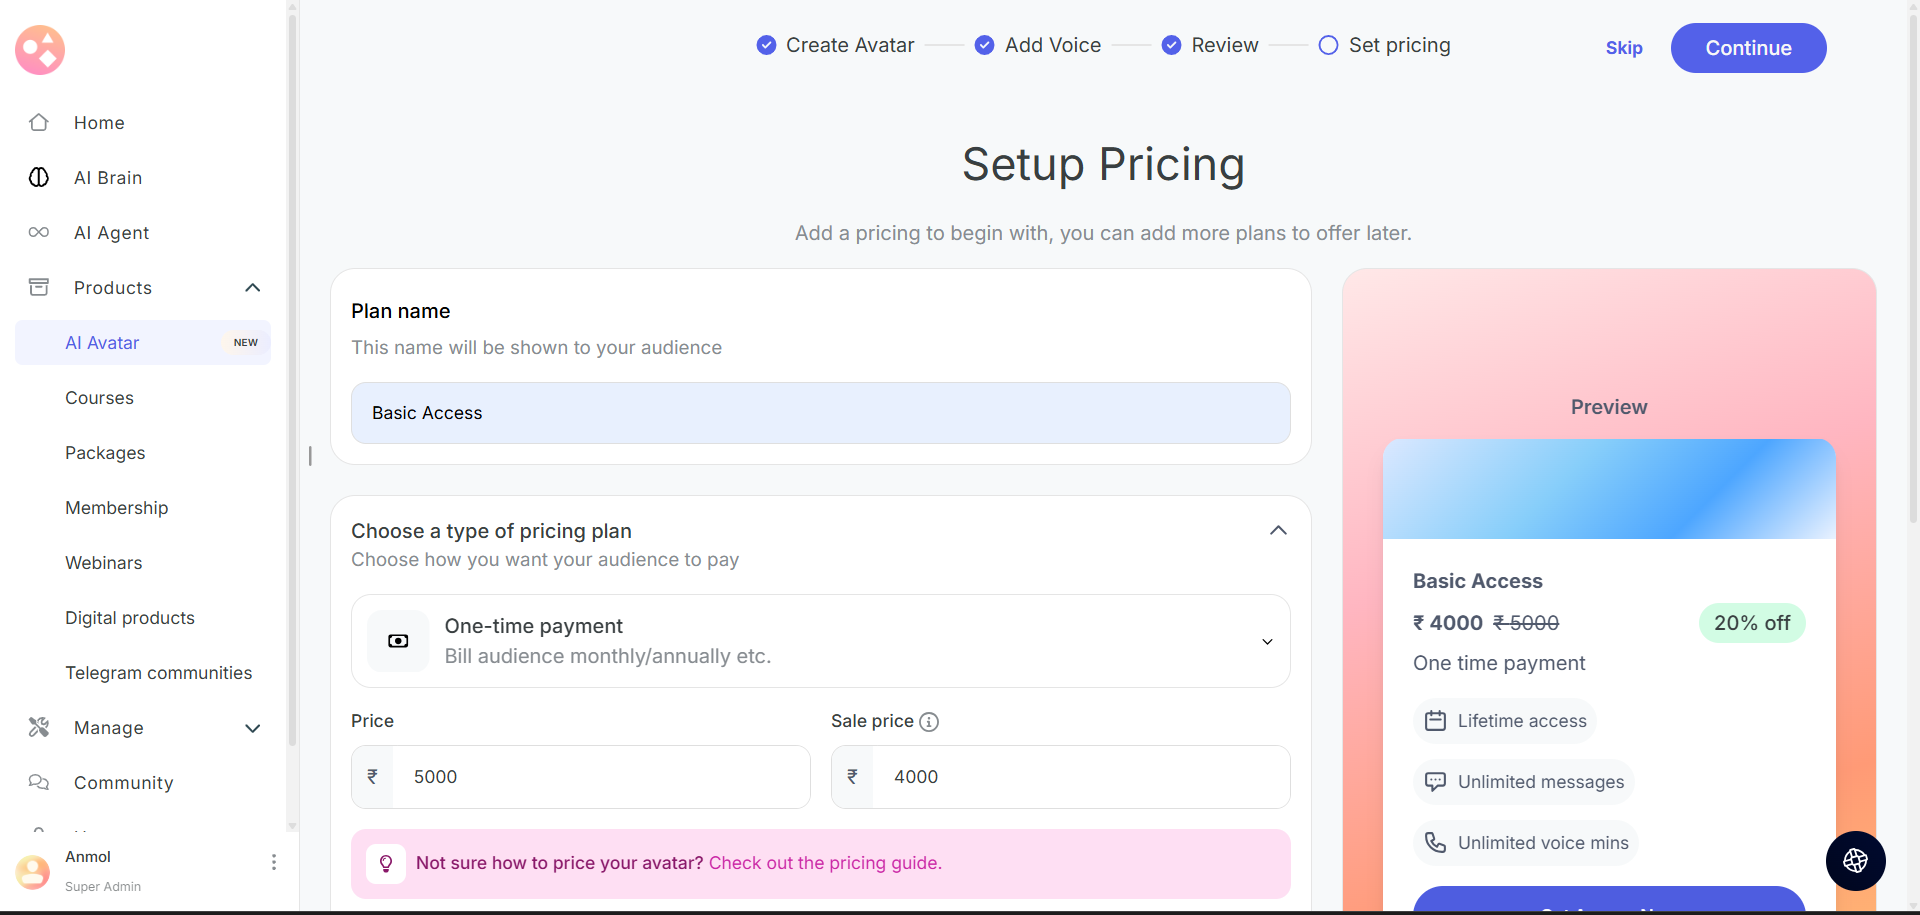 Free Plan
 Paid Plan : One-Time Payment
Pay once and unlock everything. Useful if you want full control without recurring costs
Step 7: Once you’ve reviewed all settings and ensured your Avatar is ready, click Publish to activate it.
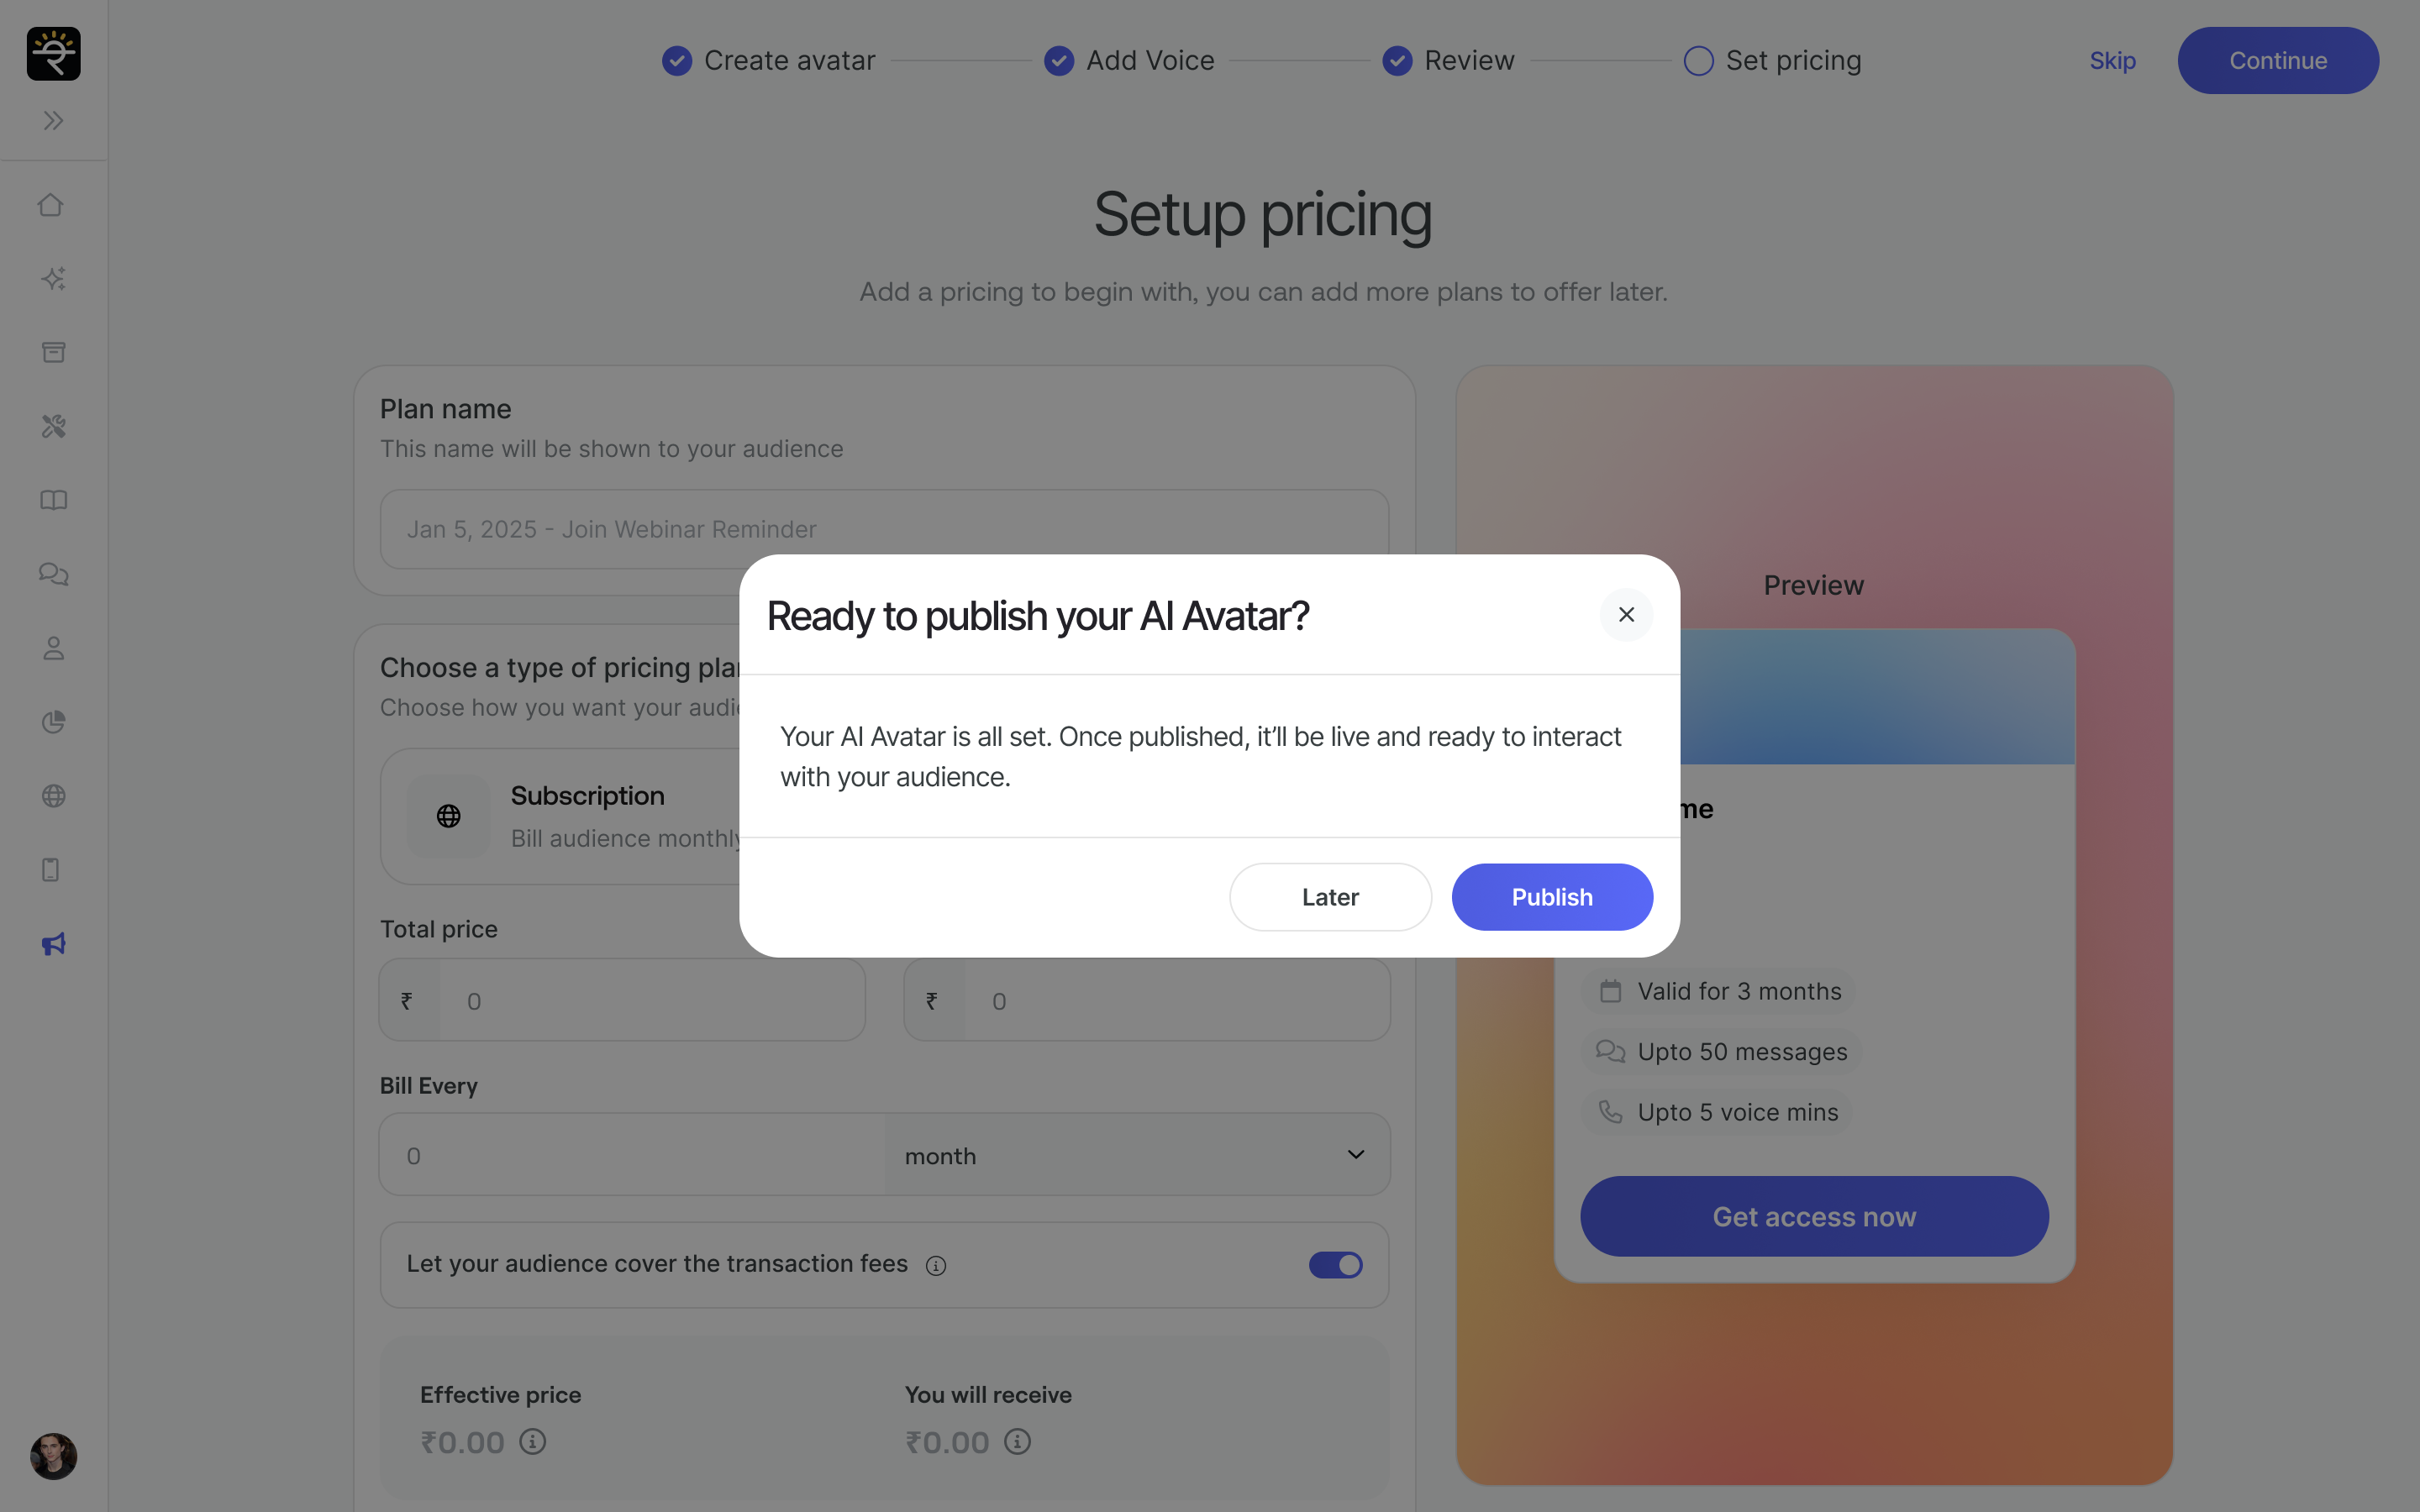
This will make your Avatar live and available for interactions with users.

- Learners can now discover and interact with your Avatar directly within courses.

Was this article helpful?
That’s Great!
Thank you for your feedback
Sorry! We couldn't be helpful
Thank you for your feedback
Feedback sent
We appreciate your effort and will try to fix the article