As a creator, Graphy Community lets you build engaged spaces for your learners- from free, open discussions to paid(new feature), exclusive clubs tied to your products. With a new revamp that we have added to this product, you can build a robust community that not only is engaged but also monetisable.
Graphy Community now comes with a refreshed design and several functional upgrades: monetizable Community Clubs, enhanced search with filters, message edit/delete controls, and more.
This article walks you through everything you need to know to manage your Community as an admin.
Getting Started: Where to Find Community
Community icon (left nav bar): Click the standalone Community icon in the left navigation bar. This takes you to the Manage Community tab (your default workspace with Mentions, Bookmarks, and your full list of clubs)
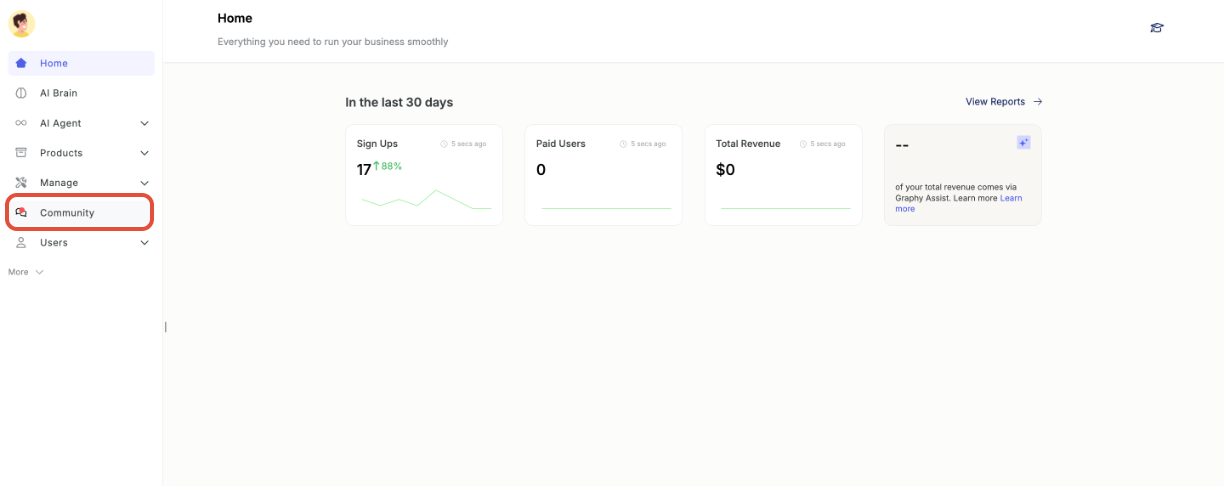
2. Products → Community Clubs: From the left navigation bar, go to Products, then click Community Clubs. This takes you directly to the Community Clubs tab.
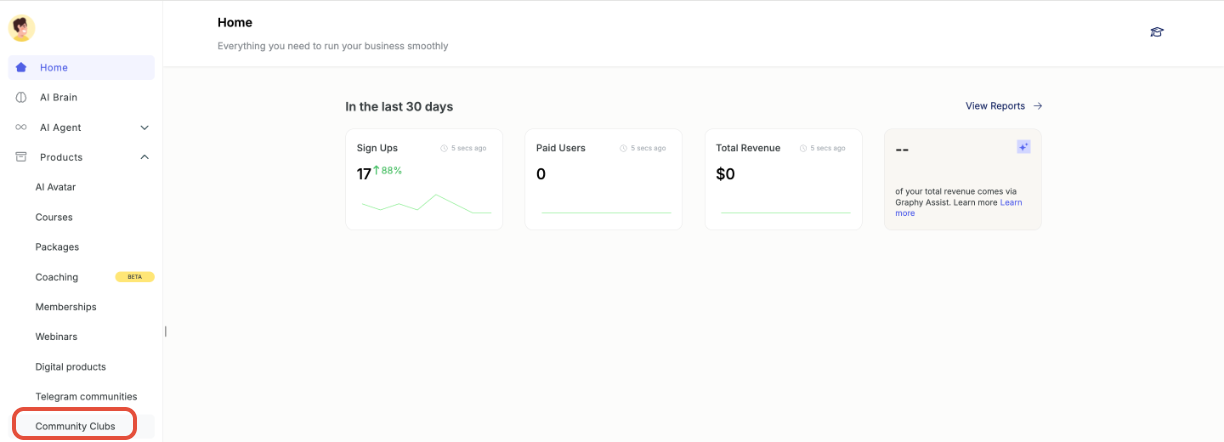
Both paths lead to the same Community product, you can always switch between the Manage Community and Community Clubs tabs from the top of the page.
1. Quick Access
At the top of your Manage Community sidebar, you'll find two shortcuts that help you keep track of activity across your entire community without switching channels.
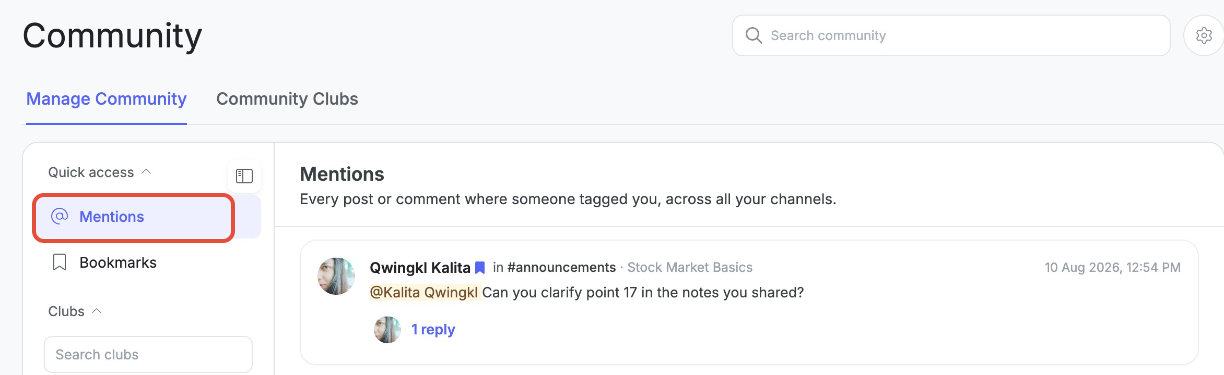
1.1 Mentions
The Mentions tab lists every post or comment where someone has tagged you (using @yourname), across all channels and clubs. Each entry shows:
The name and avatar of the person who mentioned you
The channel and club the mention appeared in
A preview of the message
Reply count, if the mention was part of a thread
Timestamps
Once you view a mention, its notification indicator turns inactive (dims), so you always know what's new versus what you've already seen.
1.2 Bookmarks
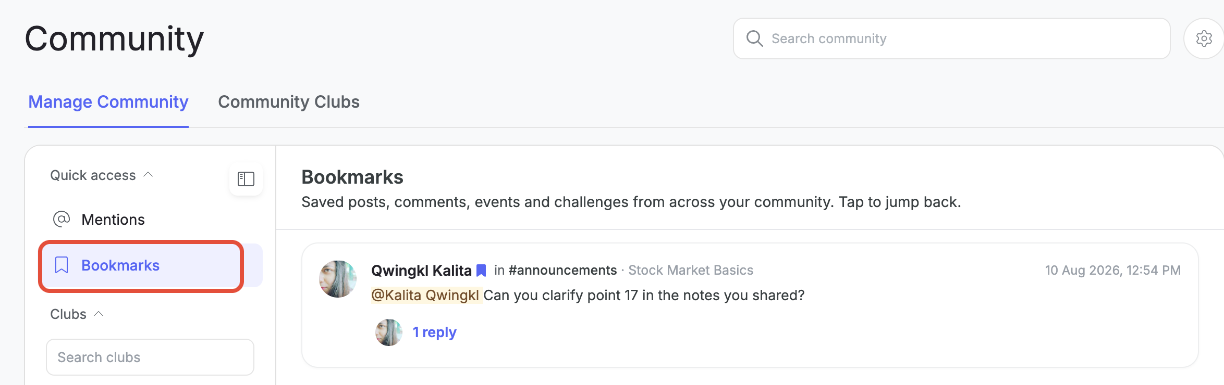
The Bookmarks tab shows all posts, comments, events, and challenges you've saved across your community, so you can jump back to them anytime.
To bookmark a message:
Hover over any message.
Click the bookmark icon in the hover toolbar.
The icon turns solid blue to confirm it's saved, and the message now appears under your Bookmarks tab.
Click the bookmark icon again on a saved message to remove it from your Bookmarks.
2. Clubs Search
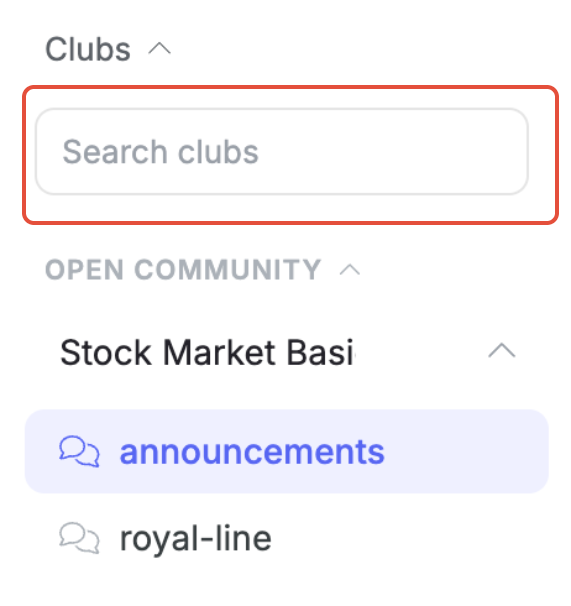
If you manage several clubs, use the Search clubs field in the sidebar (just below Quick Access) to quickly filter and locate a specific club by name, without scrolling through your entire club list.
3. Understanding Club Types
Your sidebar organizes clubs into three categories:
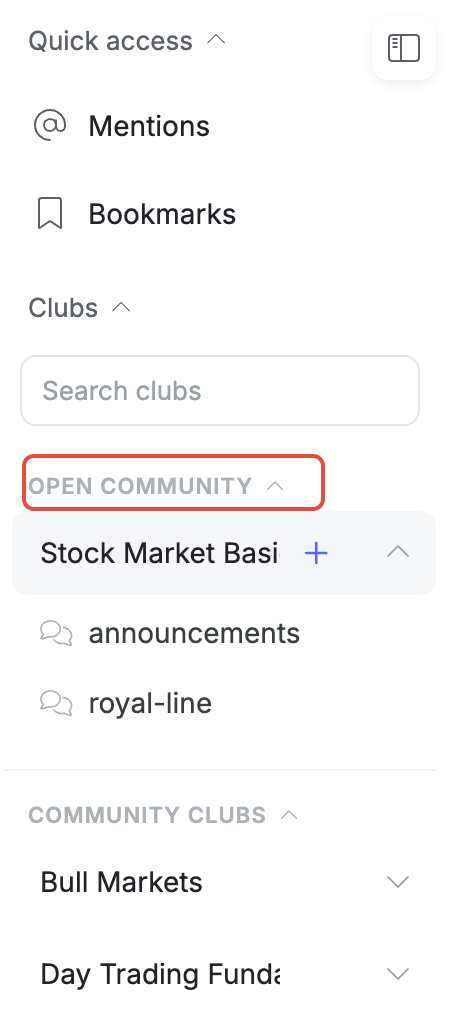
3.1 Open Community
This is your default, free space. Every learner who enrolls with you on Graphy is automatically added here-it isn't tied to any specific product and can't be monetized. Think of it as your community's front door.
3.2 Community Clubs (New)
Community Clubs are a new club type that you, as the admin, can create and monetize independently of any product. You set a price, and learners pay to join and participate- regardless of whether they've purchased anything else from you. This is ideal for building a standalone paid community experience.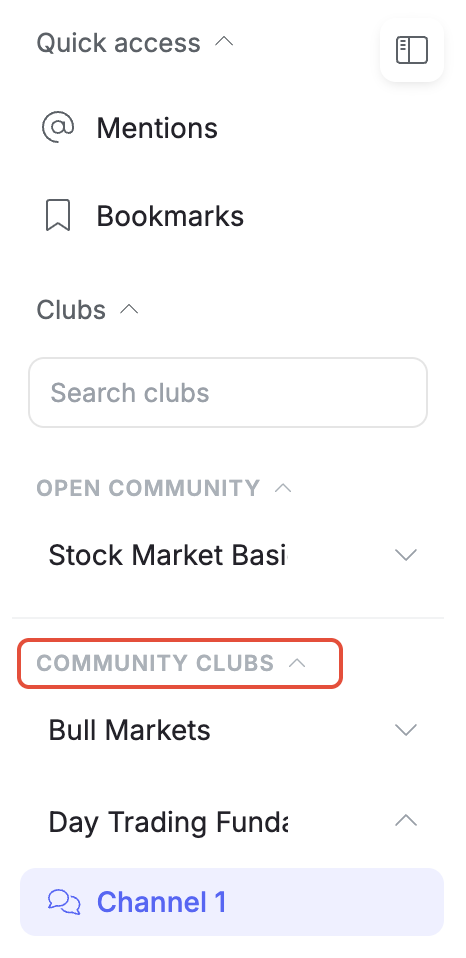
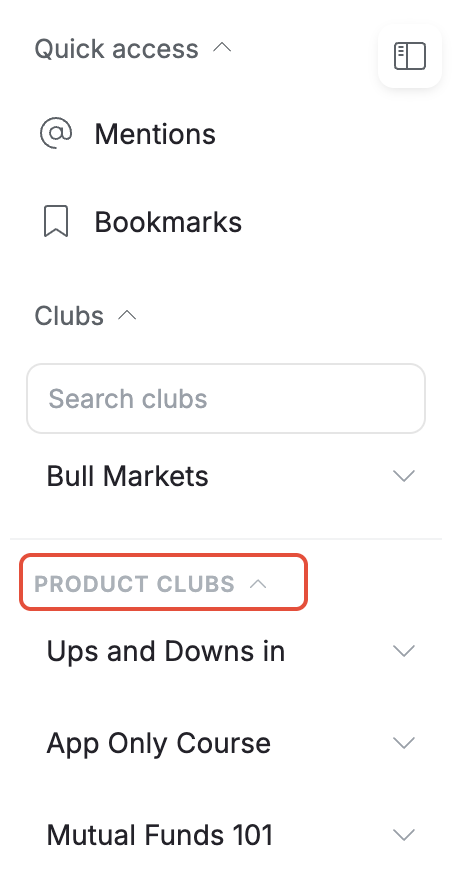
3.3 Product Clubs
Product Clubs work the same way they always have- they're automatically created around a specific Graphy product and learners get access when they purchase that product. There's no separate pricing step; access is tied entirely to the product purchase.
4. Channels Inside Clubs
Every club -Open Community, Community Club, or Product Club can have up to 15 channels. Channels are where actual conversations happen, organized by topic (e.g., #announcements, #discussions, #question-answer).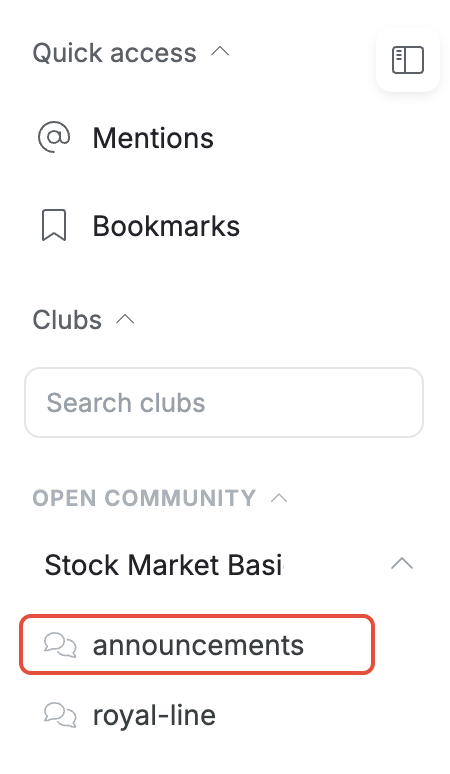
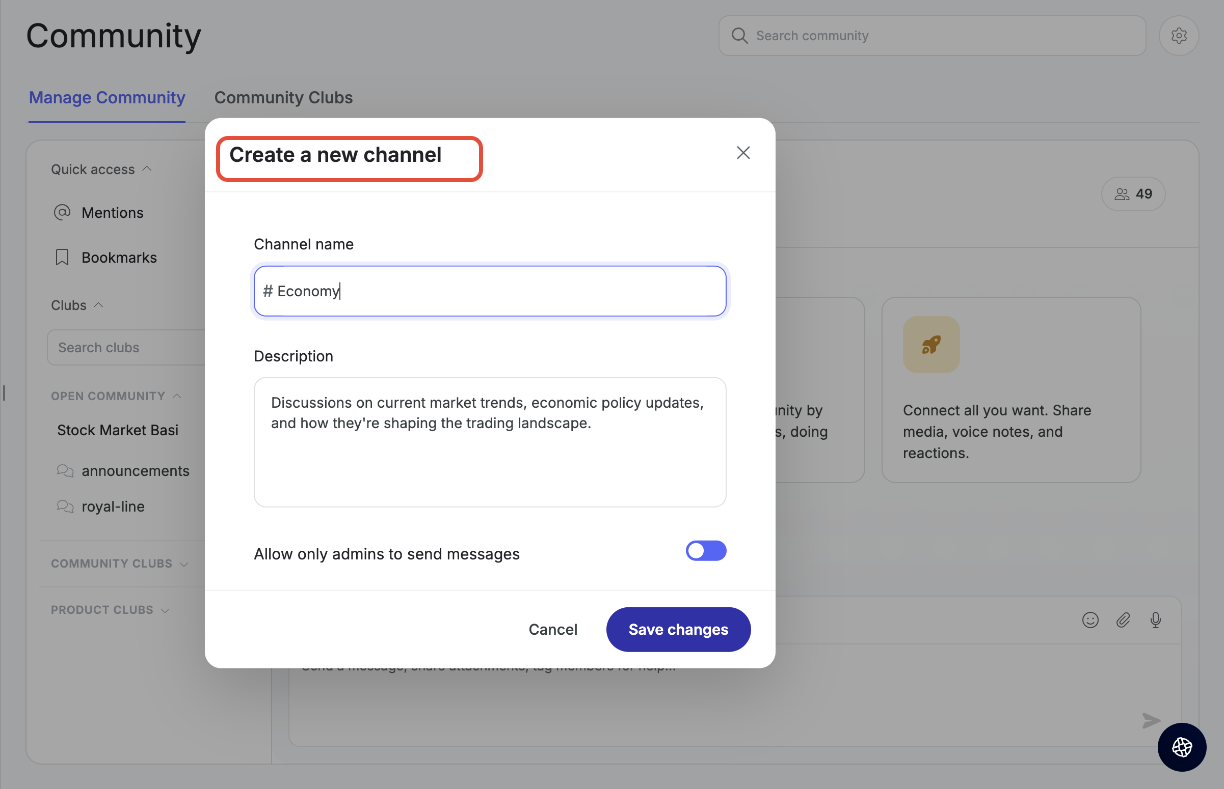
4.1 Creating a Channel
Open the club you want to add a channel to.
Click to create a new channel.
In the Create a new channel modal, fill in:
Channel name (appears with a # prefix)
Description (optional, helps members understand the channel's purpose)
Allow only admins to send messages — toggle this on to make the channel read-only for learners (useful for pure announcement channels)
Click Save changes.
4.2 Renaming a Club and Channel
Club and channel names aren't locked in at creation; you can rename at any time from Settings, whether it's brand new or has been active for a while.
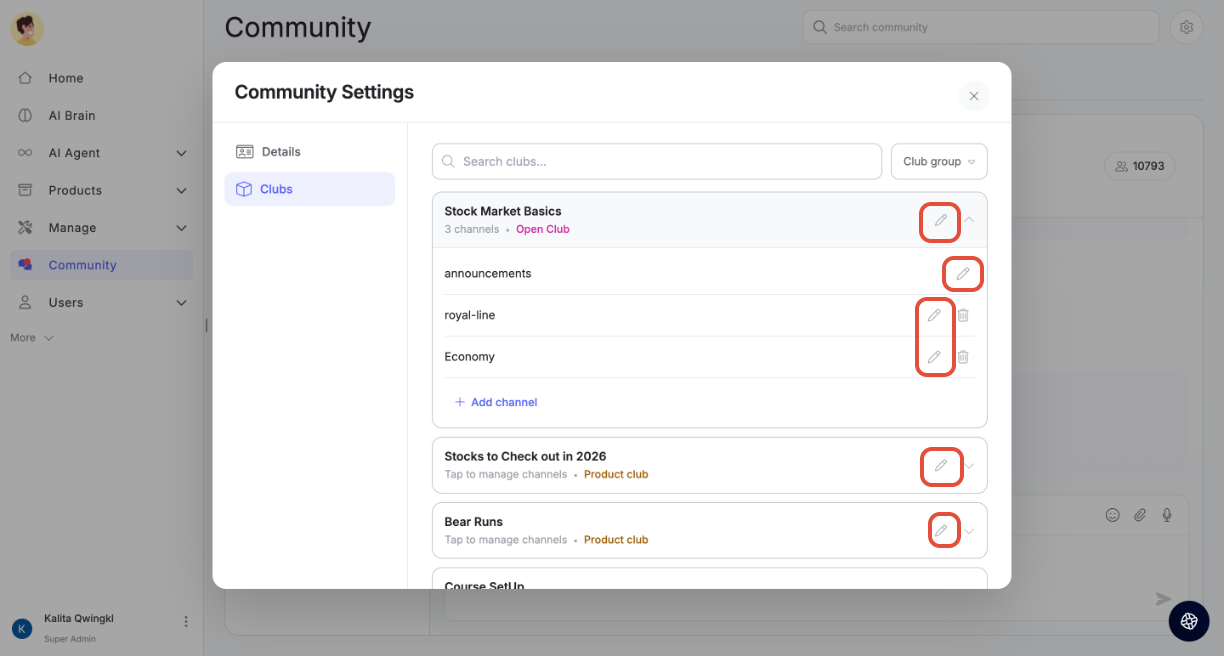
This applies uniformly across all three club types.
5. Search
Community search has been significantly enhanced in this revamp. Previously, search was basic; now you can search by user, channel, or keyword, and narrow results using filters.
5.1 Starting a Search
Click the Search community bar at the top of the page. If you haven't typed anything yet, you'll see:
Recently searched — your last few searches, each removable individually
Two quick-entry shortcuts:
@ — click to search users
# — click to search channels
5.2 Searching for a User
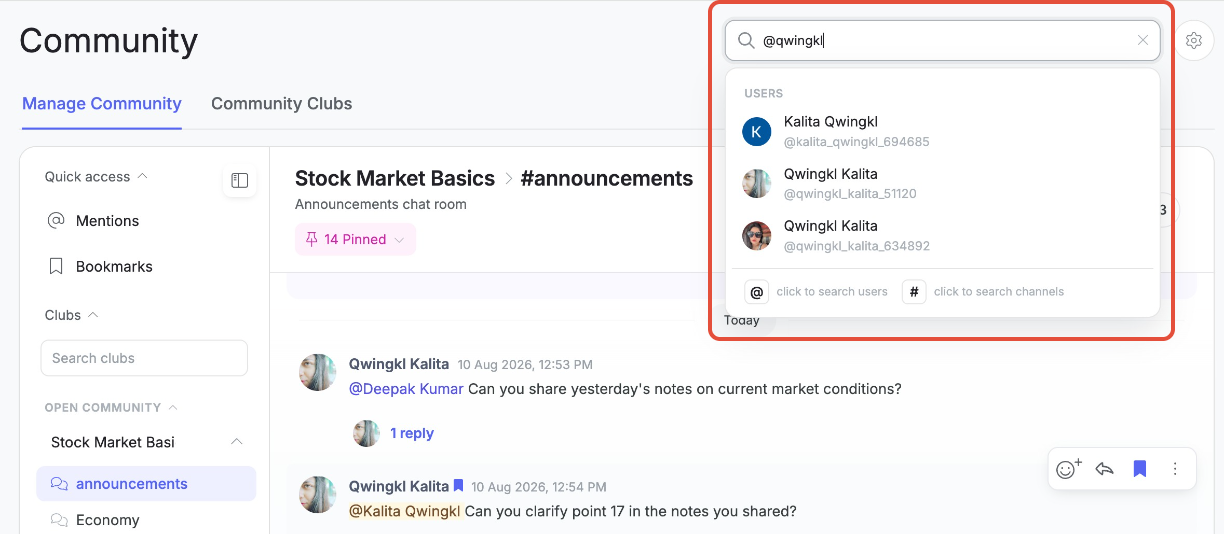
Type @ followed by a name to see a list of matching users, along with their unique handles (helpful when multiple members share the same display name). Selecting a user adds them as a chip in the search bar, and you can then search specifically within their messages.
5.3 Searching for a Channel
Type # followed by a name to see a list of matching channels with their unique handles will return search results. Selecting a channel adds them as a chip in the search bar, and you can then search specifically within their messages.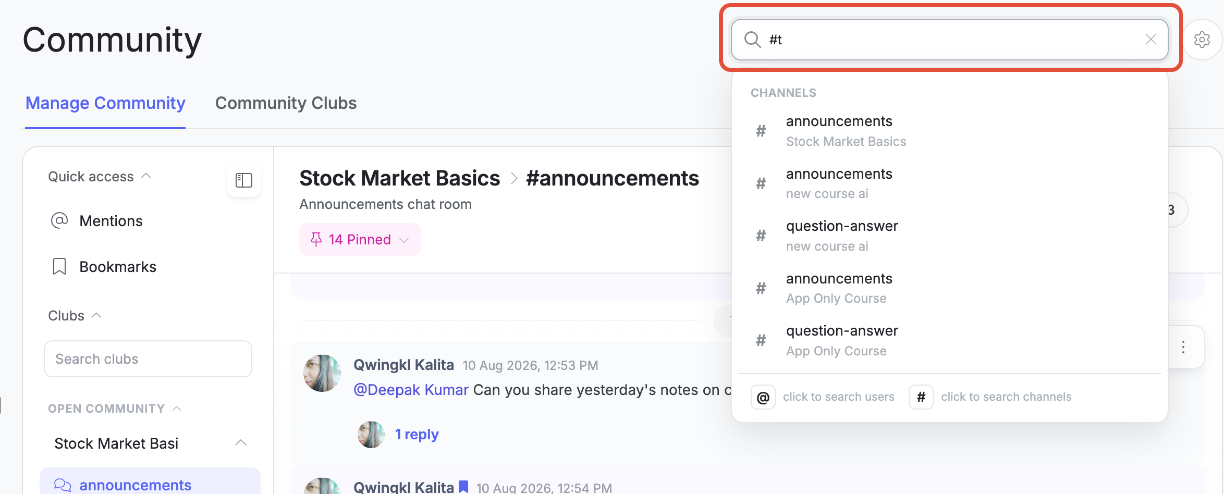
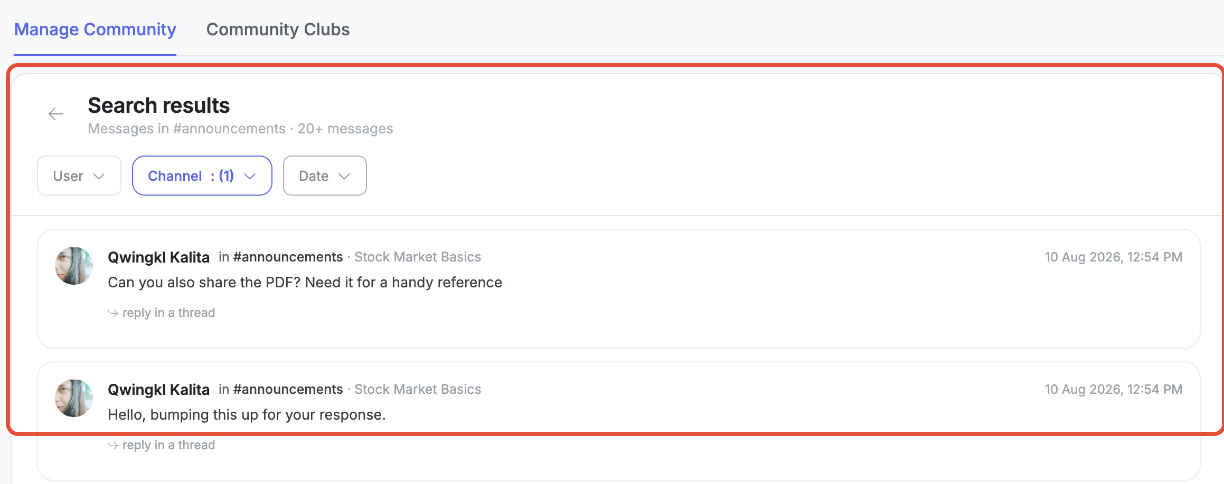
5.4 Search Results and Filters
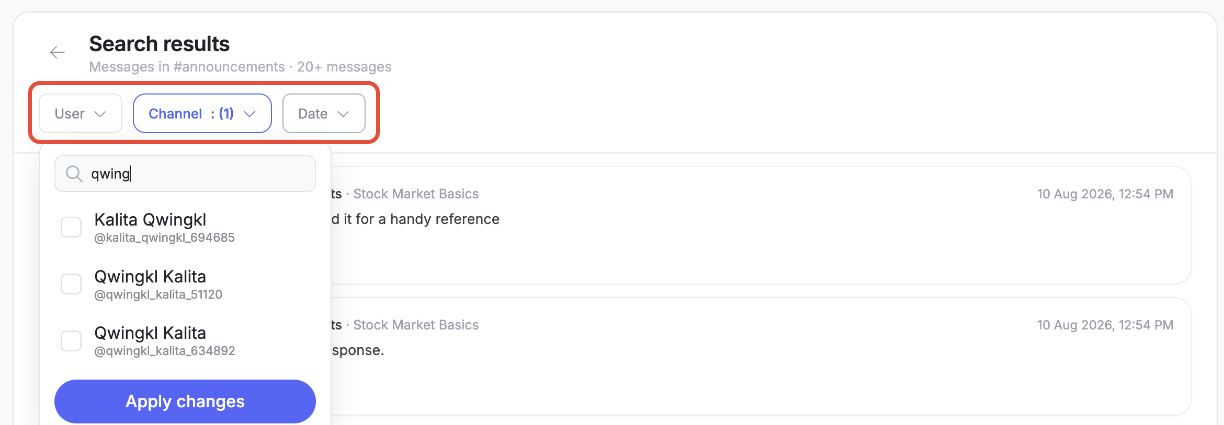
Once you run a search, you land on the Search results screen. From here, you can refine results using three filters:
User — narrow to messages from a specific member
Channel — multi-select which channels (across which clubs) to search within; this is a new capability that wasn't previously available
Date — filter by on/before/after a specific date
Each result shows the sender, the channel and club it was posted in, a preview of the message, reply count (if any), and timestamp. Clicking a result takes you straight to that message in its original channel.
6. Threads
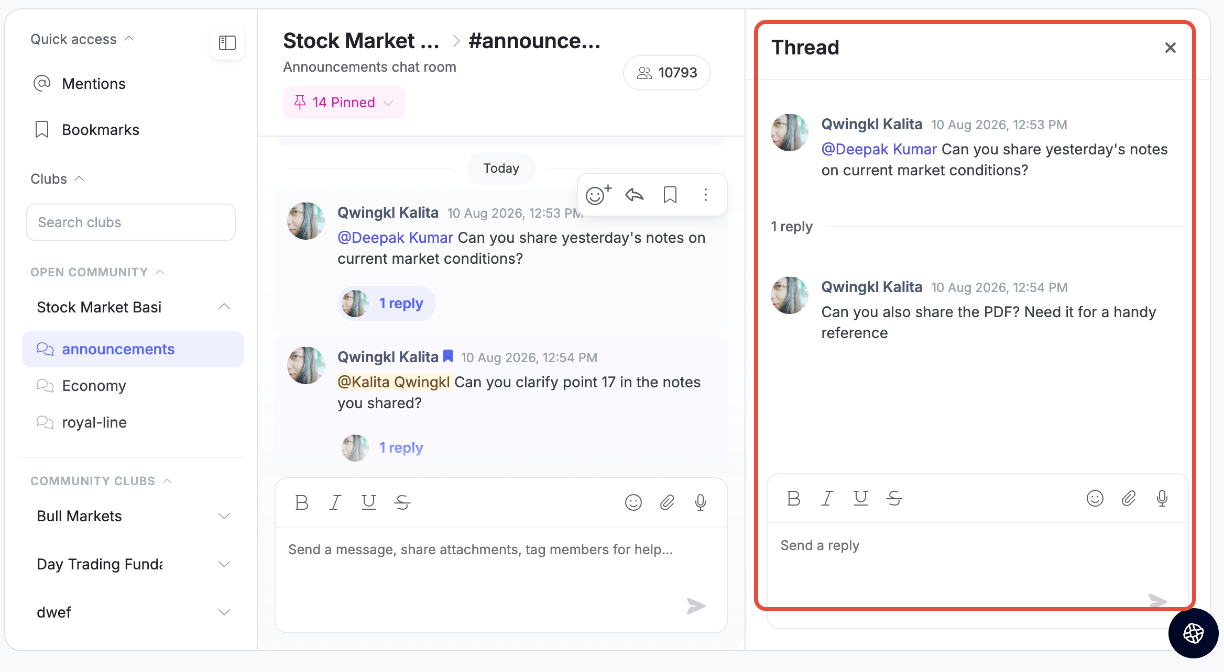
When a message receives replies, they're grouped into a thread. Click the reply count under any message (e.g., "3 replies") to open the Thread panel on the right side of the screen.
Inside the thread panel, you can:
View the original message and all replies
Reply directly within the thread using its own message composer
Close the panel anytime using the X in the top-right corner
7. Messages
7.1 Sending a Message
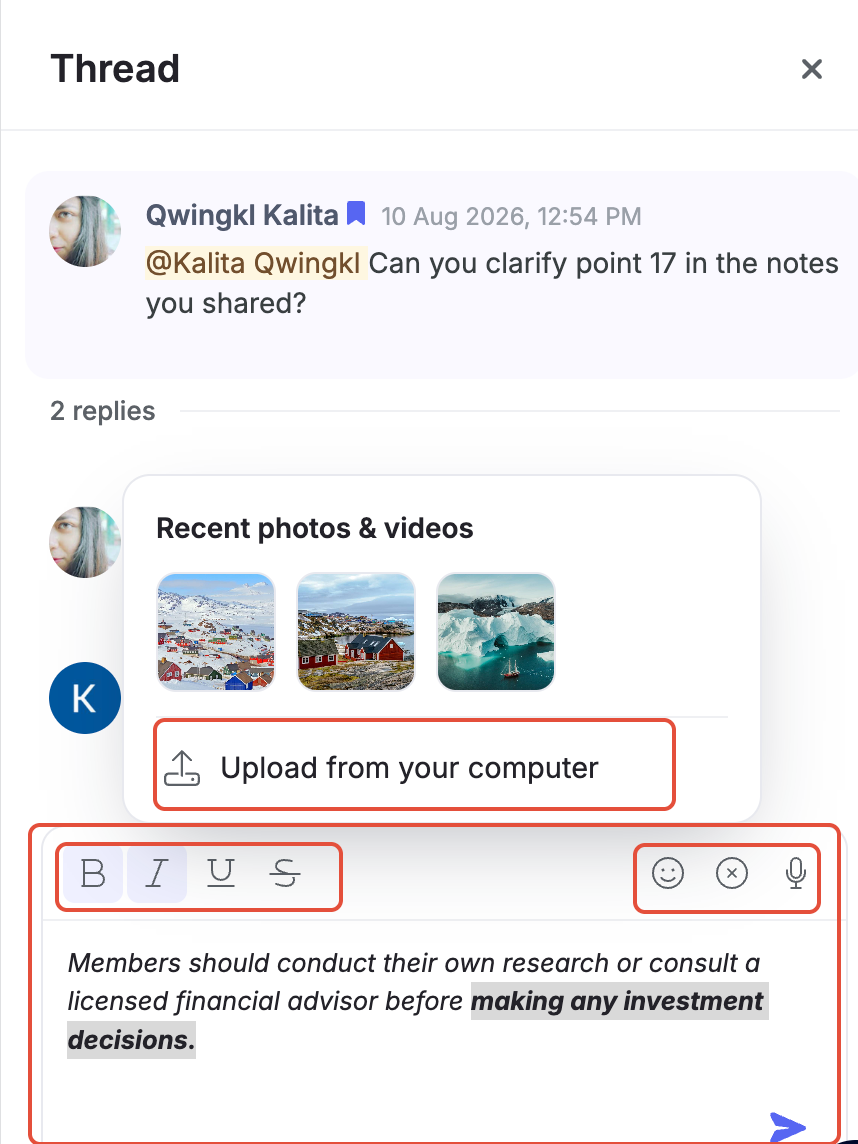
Every channel (and thread) has a message composer at the bottom with:
Text formatting: Bold, Italic, Underline, Strikethrough
Emoji picker — searchable, categorized emoji grid
Attach a file — share photos, videos, PDFs, or upload from your computer
Voice notes — record and send audio messages directly, with a live waveform and timer
 7.2 Message Actions
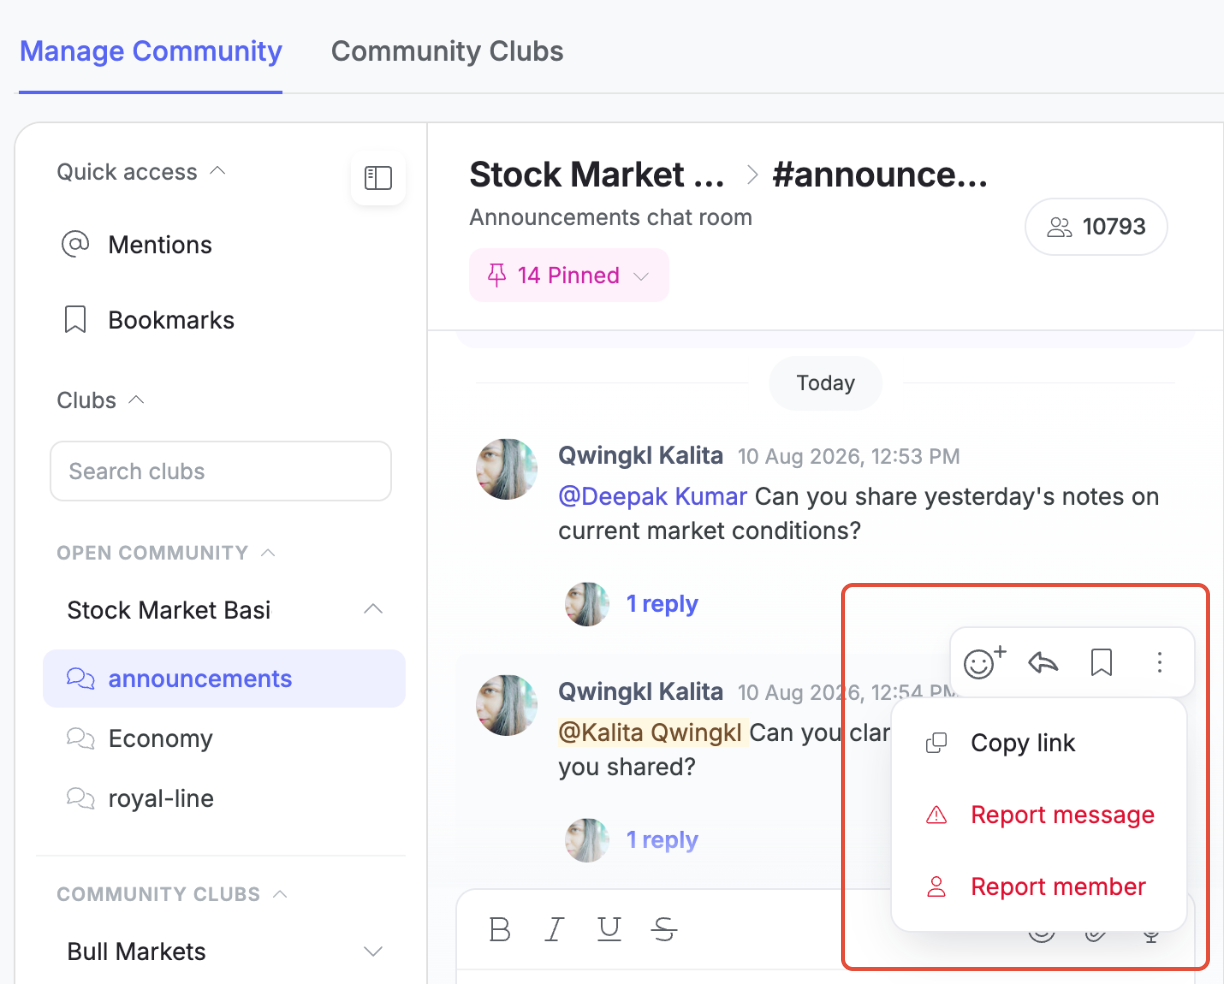
Hovering over any message (in the main channel or inside a thread) reveals a quick action toolbar:
React with an emoji
Reply (opens/adds to a thread)
Bookmark the message
More options (⋮), which includes:
Copy link — grab a direct link to that specific message
Report message
Report member
7.3 Edit and Delete Settings
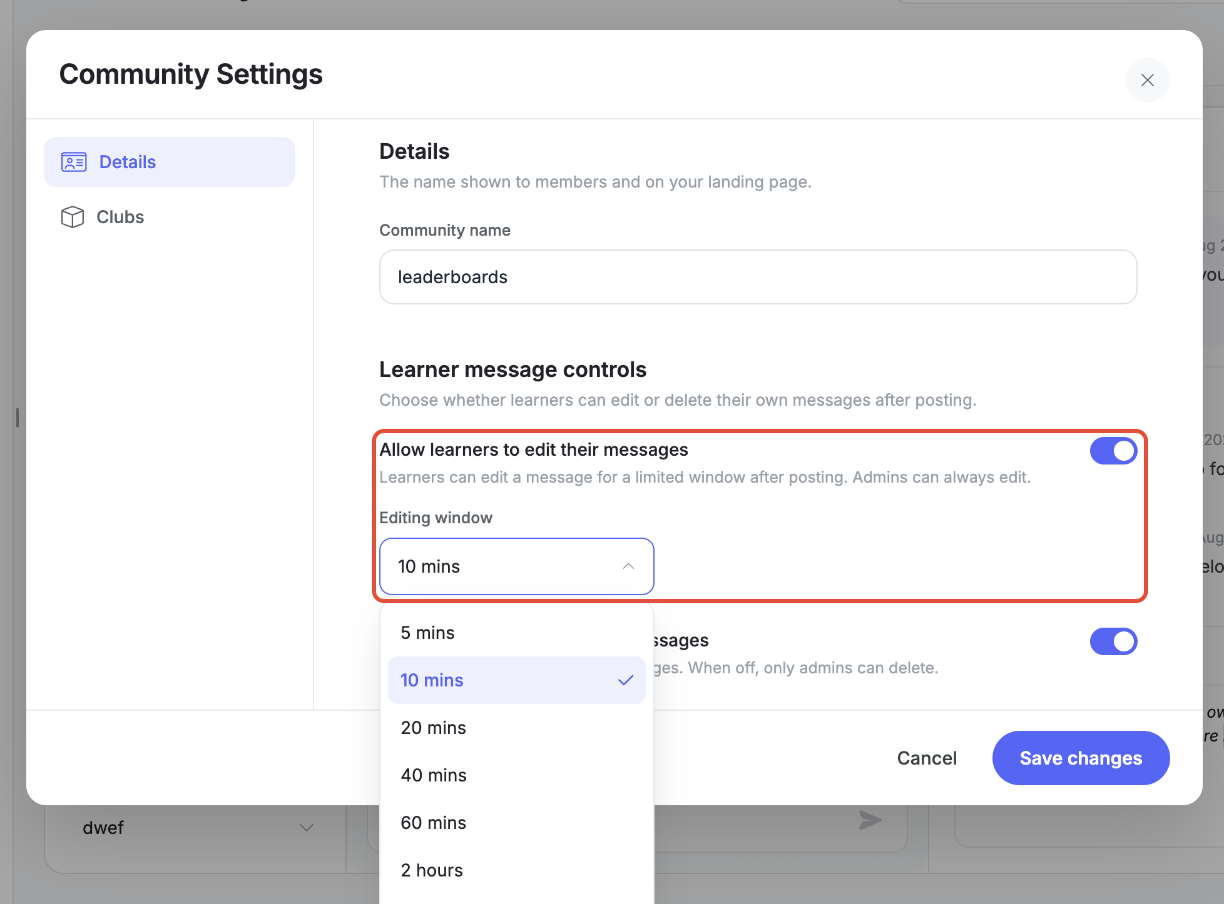
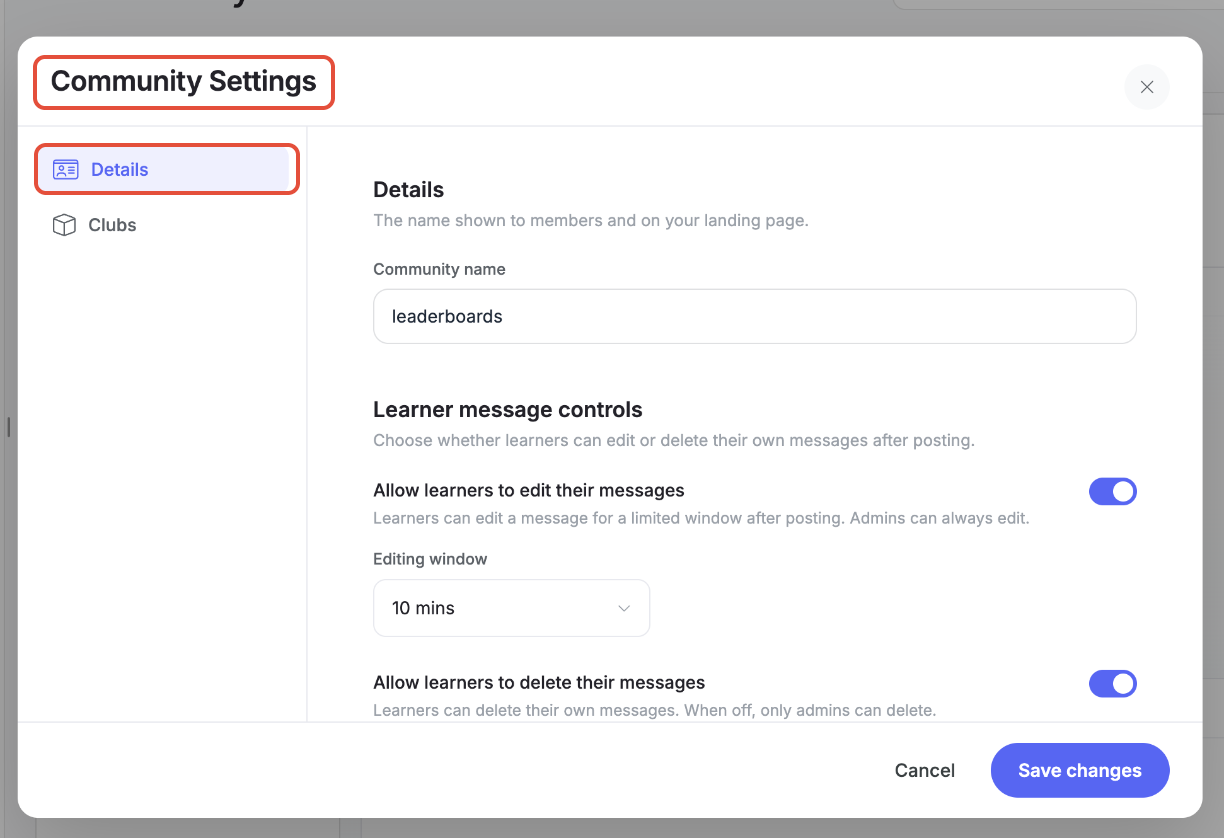
As an admin, you can allow learners to edit or delete their own posts within a set time window. From your community settings, you can:
Enable edit access for a configurable window, ranging from 5 minutes to 24 hours after a message is sent
Enable delete access for posts
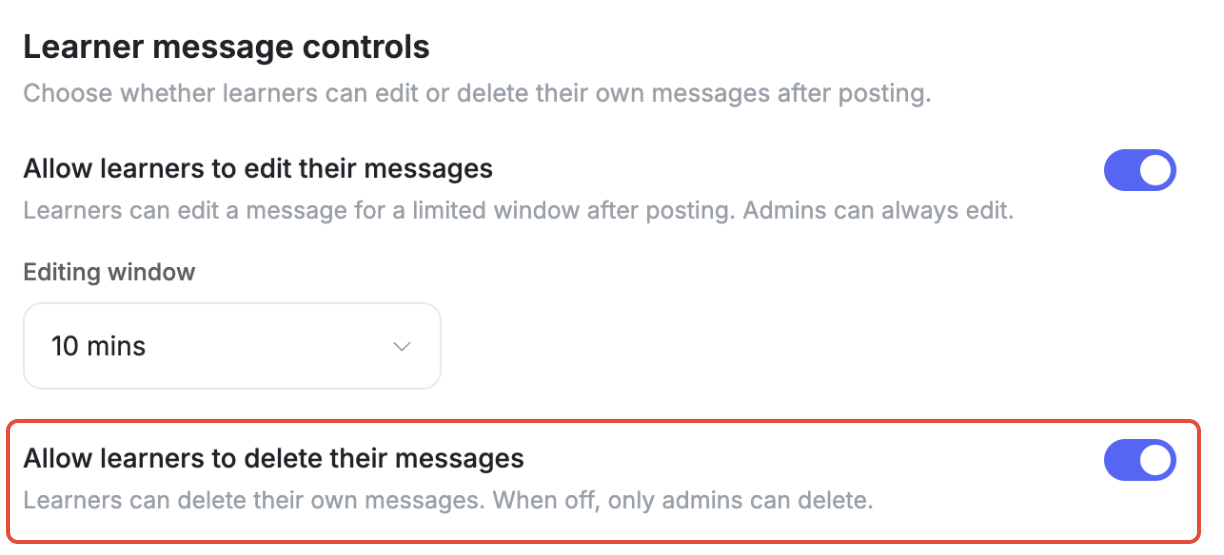
Once turned on, these settings apply to all learners across the community.
8. Pinned Messages
Important messages in a channel, like key announcements or rules can be pinned so they're easy to find. Pinned messages appear as a count at the top of the channel (e.g., "14 Pinned"), and clicking it expands the list.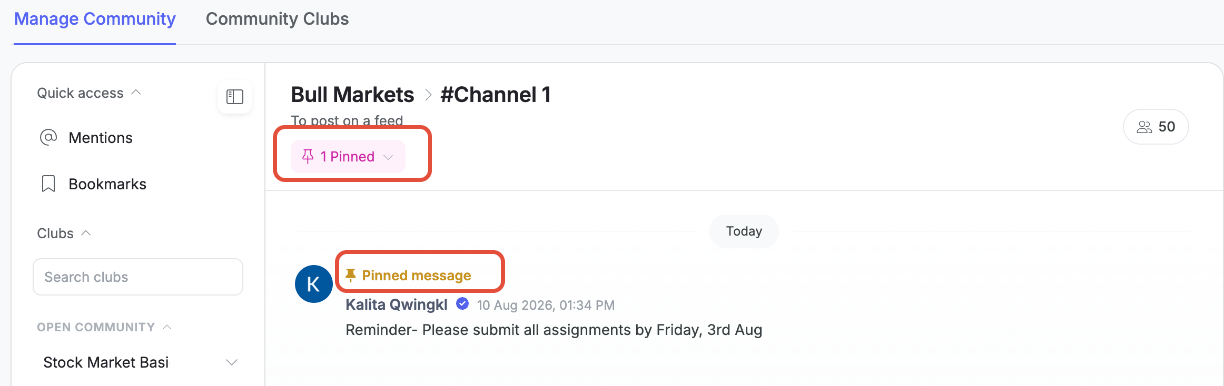
9. Community Settings
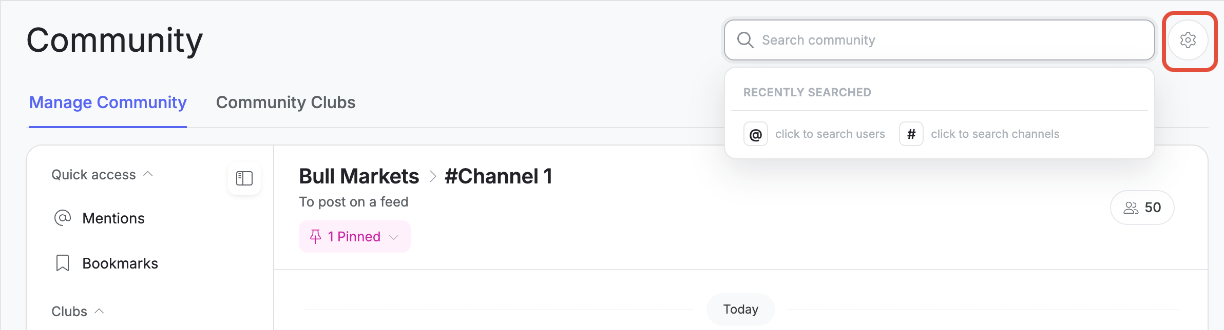
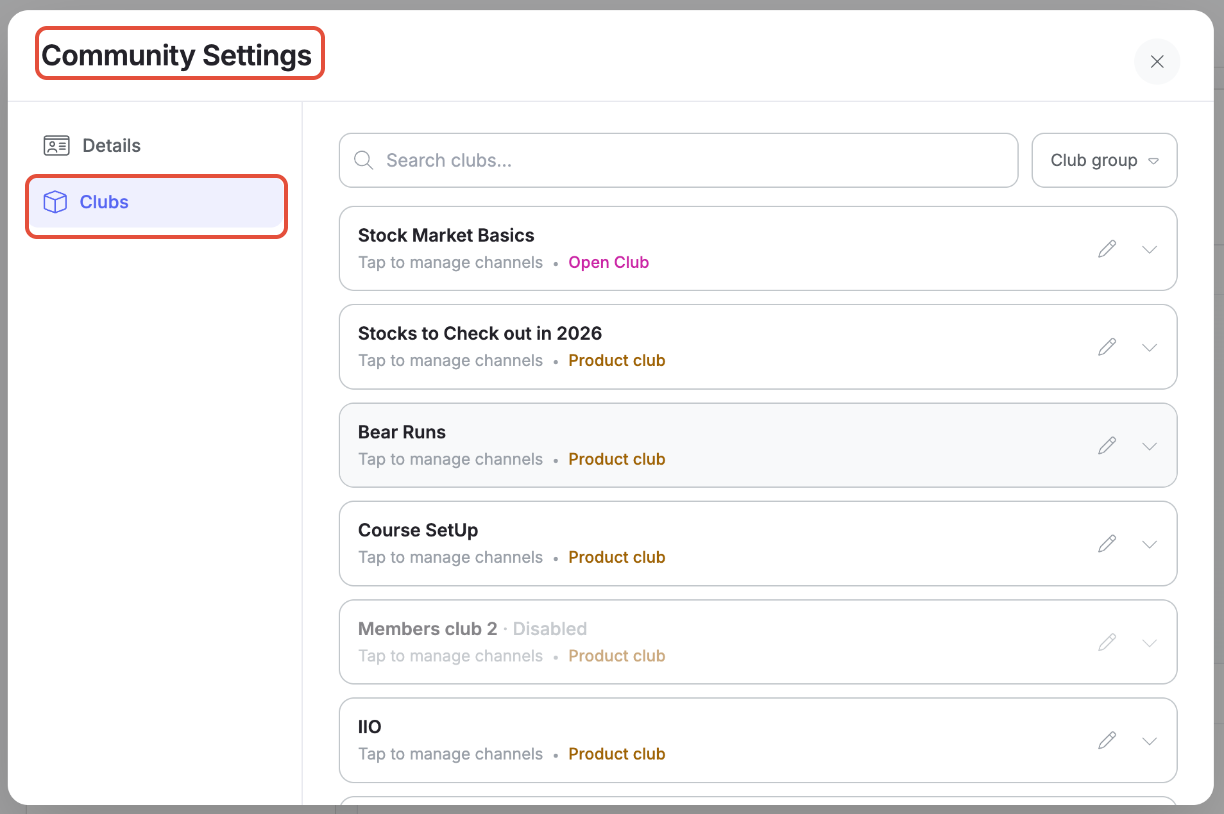
From the gear/settings icon at the top of the Community page, admins can configure community-wide preferences, including message edit/delete windows, permissions, and other controls covered above.
Learn how to Create a Community Club
Learn how to Edit a Community Club
Was this article helpful?
That’s Great!
Thank you for your feedback
Sorry! We couldn't be helpful
Thank you for your feedback
Feedback sent
We appreciate your effort and will try to fix the article