Community Clubs are a brand new addition to Graphy Community. These clubs let you build a standalone, monetizable space for your audience- one that isn't tied to any product you sell. You set the price, control the channels inside, and manage members as you wish to.
This guide walks you through creating a Community Club, editing one after it's live, and setting up multiple pricing plans.
1. How to Create a Community Club
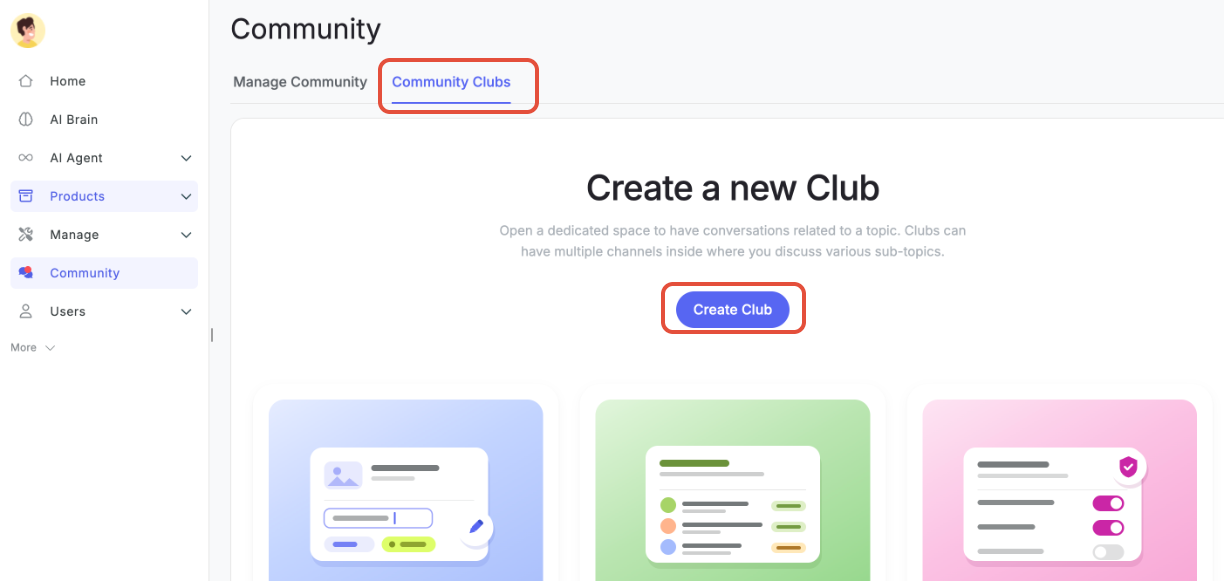
You can reach the Community Clubs tab either via Products → Community Clubs, or via the Community icon in the left nav → Community Clubs tab.
If you haven't created any clubs yet, you'll see an introductory screen explaining what Community Clubs are - dedicated spaces for topic-based conversations that can hold multiple channels for sub-topics, along with a Create Club button.
Creating a club happens in three steps, tracked by a stepper at the top of the screen: Landing page → Club details → Pricing plan.
Step 1: Landing Page
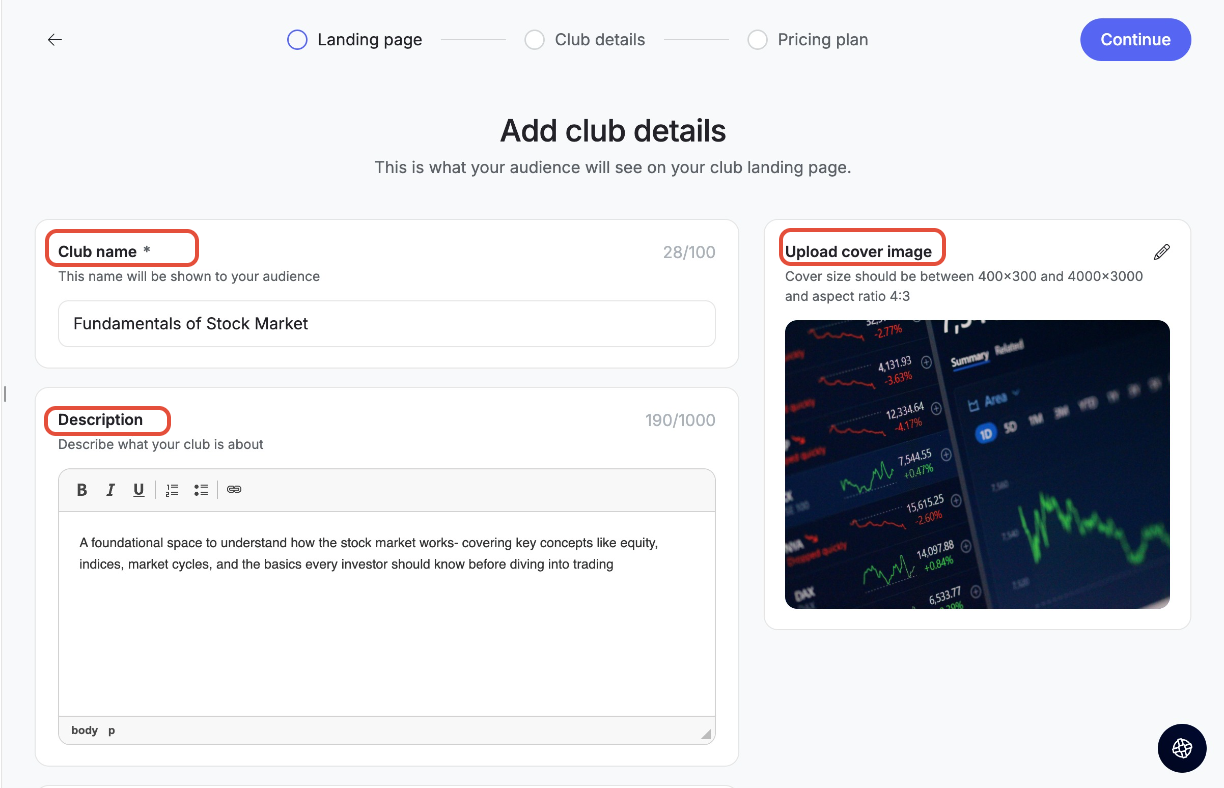
This is what your audience sees on the club's landing page.
Club name* (required, max 100 characters) - shown to your audience
Description (max 1000 characters)- use the rich text editor (Bold, Italic, Underline, numbered/bulleted lists, link insertion) to tell members what they'll get inside: discussions, events, AMAs, resources
Upload cover image - size must be between 400×300 and 4000×3000px, aspect ratio 4:3. Click the edit icon to open the Update cover image modal, where you can either Select from Unsplash (search a stock photo library) or Upload your own image from your computer
Frequently asked questions - click + Add to add short Q&A pairs that help potential members decide before joining (e.g., "Who is this club for?"). Each FAQ can be edited or deleted afterward.
 Click Continue to move to the next step.
Step 2: Club Details
Here, you set up the channels inside your club. For each channel, you can specify a name, an optional purpose, and whether only admins can post. See the companion "Managing Your Community" guide for the full channel setup walkthrough- the same fields apply whether you're creating a club or editing one later.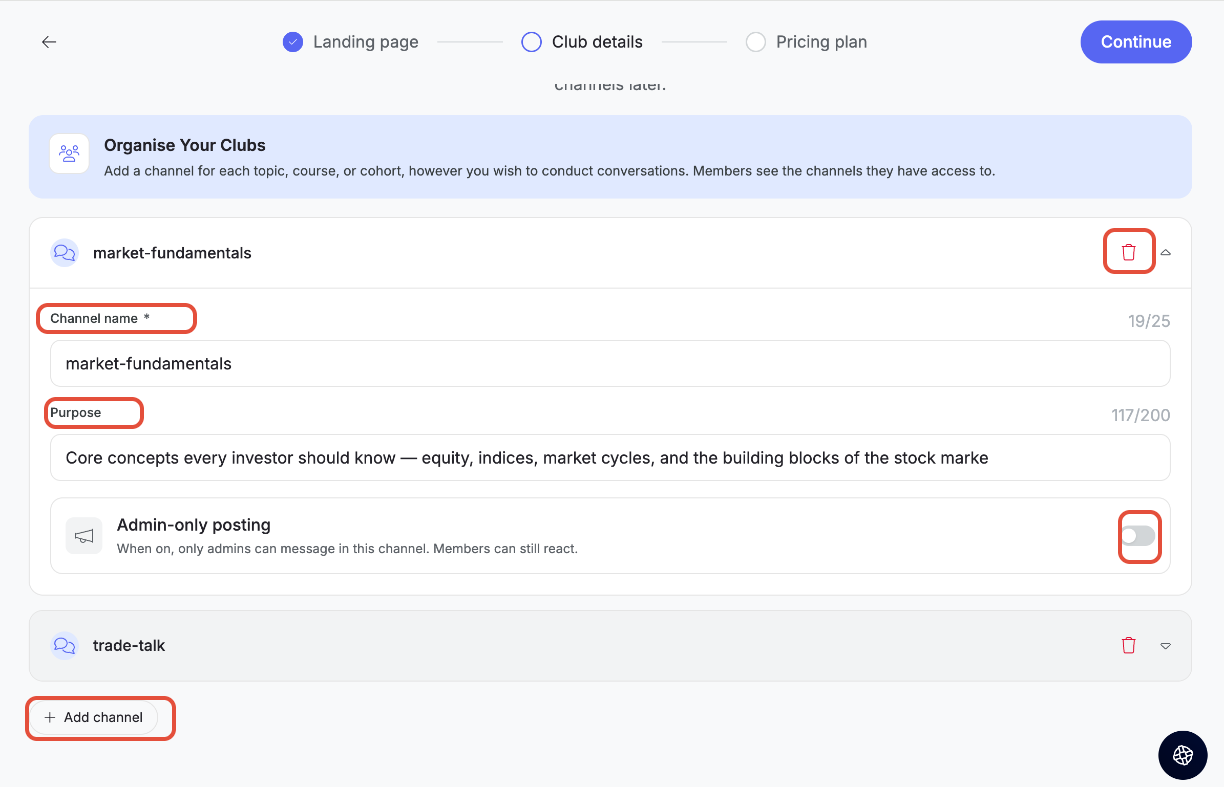
Click Continue once your channels are set up.
Step 3: Pricing Plan
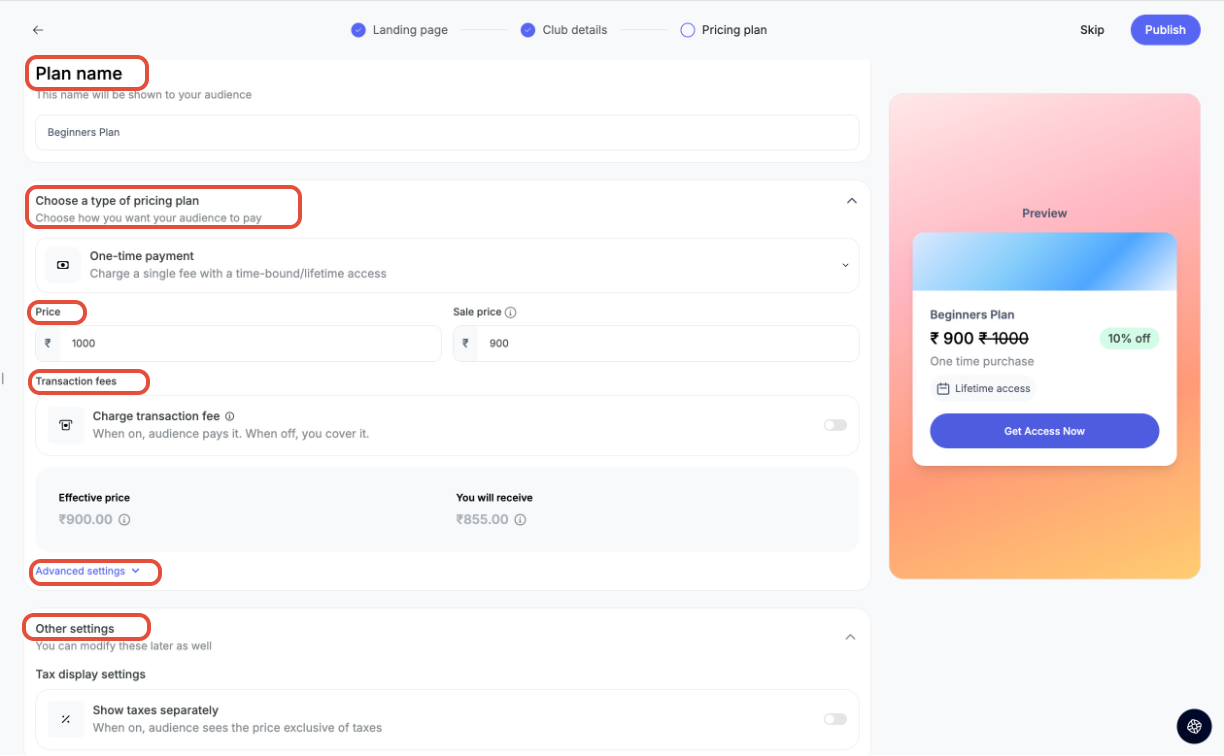
Plan name - shown to your audience
Choose a type of pricing plan:
Free -no charge; choose time-bound or lifetime access
One-time payment - charge a single fee with time-bound or lifetime access. Set a Price and an optional Sale price -when set, the landing page shows the original price struck through with a "% off" badge
Subscription- set up recurring payments for continuous access. Set Price, Sale price, and Bill Every [number] + [Week(s) / Month(s) / Year(s)]. Note that payment gateway charges for subscription-based pricing differ from regular plans.
Transaction fees- toggle Charge transaction fee on to pass the fee to your audience, or leave it off to absorb it yourself. The Effective price and You will receive amounts update automatically based on this.
Advanced settings- customize the button text shown to members (default: "Get Access Now"), and set Plan duration to Limited or Unlimited under Expiry settings.
Other settings -toggle Show taxes separately if you want your audience to see the price exclusive of taxes.
A live Preview card on the right shows exactly what your audience will see, updating as you fill in each field.
 From here you can:
Skip — publish the club without a pricing plan yet (add one later from the Pricing tab)
Publish — go live immediately with the plan you've set up
Once published, you'll see a confirmation: "Club created successfully." You will see the club appear under Community Clubs Tab, and also under Manage Communities in the nav bar
Once your community club is created, you may also want to edit it. Learn at How To Edit a Community Club.
Was this article helpful?
That’s Great!
Thank you for your feedback
Sorry! We couldn't be helpful
Thank you for your feedback
Feedback sent
We appreciate your effort and will try to fix the article